

How often do you need to get off the couch to turn off a light or lock a door? How often do you forget to shut off a light or lock a door at night? Wouldn’t it be so much easier if you could control all your home’s smart devices from your phone? Well, with the Vivint app, you can do all that and more. We personally tested the Vivint app for several weeks, digging into all the features and nuances, and we resurfaced with a much better idea of where the app excels and where it falls short.

Vivint App Notifications
In this guide, we’ll take you from getting the Vivint app on your phone to automating your smart home security system. We’ll get as close as we can to turning the Vivint app into your own personal JARVIS from “Iron Man” by covering the following topics:
- What is the Vivint app?
- How to download and set up the Vivint app
- Using the Vivint app
- Connecting devices to the Vivint app
- Automating your home with the Vivint app
- Wrapping it up
>> Dive Deeper: Vivint Smart Home Security Review
What Is the Vivint App?
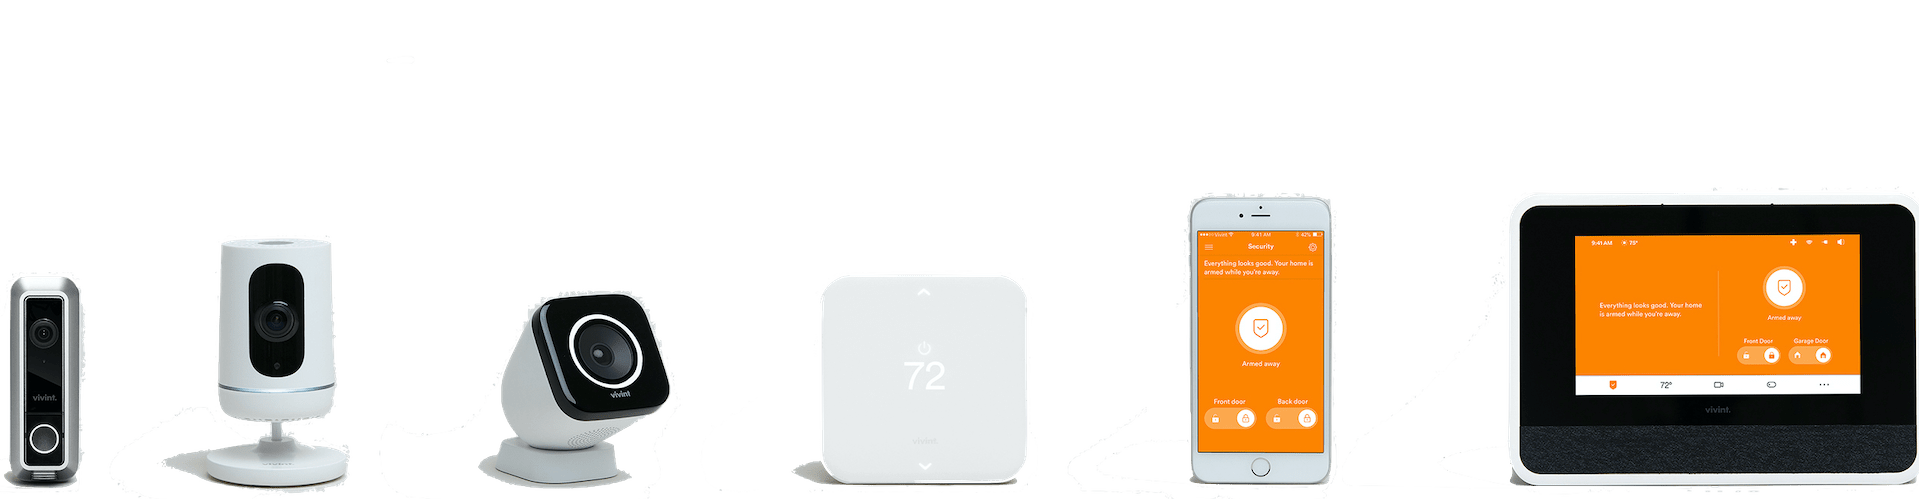
The Vivint app gives you complete control over every smart device in your home. It’s like having your very own personal remote for your entire home security system and any other smart devices you own. Whether you want to check your home security cameras, lock your doors, or change the temperature in your home, you can do it all from the Vivint app.
Should You Use the Vivint App or Vivint Classic?
As you’d expect, the Vivint app has evolved over the past decade. It used to have a basic user interface that was clunky to navigate. It also lacked what are now key features such as automation capabilities and shortcuts. If you’re used to the old interface and don’t want to change, you should download the Vivint Classic app instead of the “Vivint” app. If you’re new to Vivint, however, go for the current version.
It's worth noting that the Vivint Classic app is essentially abandoned at this point. The iOS and Android versions haven't received a significant update in years. User reviews tell the story pretty clearly. The Vivint app has a rating of 4.6 stars on the Apple App Store and roughly 4.3 stars on Google Play, while Vivint Classic is below three stars on both platforms.
How to Download and Set Up the Vivint App
You know how Tony Stark can control everything in his house with just a few taps on a touch screen? The Vivint app is just like that. As long as your devices have smart home automation capabilities, the Vivint app can control it.
While it can’t turn you into Iron Man, of course, but it can definitely make your home feel ready for the future. Let’s dive into downloading and setting up the Vivint app to give you more control over your home security system.
Downloading the Vivint App

Downloading the Vivint App on iPhone
If you’ve ever put an app on your phone, you already know the process for downloading the Vivint app. But we’ll break it down step by step just to make sure.
- Open your app store: Start by opening your device’s app store. Android devices can use the Google Play Store and iOS devices can use the Apple App Store.
- Find the Vivint app: At the top of your app store, type “Vivint” into the search bar and tap the “Search” button. Once you find the Vivint app, open the page.
- Download the app: With the Vivint app page open, click the “Install” or “Get” button at the top. Pressing the button starts the download, but you may need to enter your password to confirm your download, depending on your device’s settings.
- Open the app: Once the download completes, the Vivint app should be on your device’s home screen or app screen. Tap the icon to open the app.
Pro Tip: During the Vivint installation, your professional installer can help you get the Vivint app on your phone and set up if you need some in-person help. Our Vivint installation tech, Don, was super helpful in that regard.

Photo of our Vivint Installation Specialist, Don
Creating an Account for the Vivint App
Before you can start using the Vivint app to control your Vivint home security system, you need to create an account. Below is how to set up an account to start using the Vivint app.
- Creating the primary user account: When you purchase a Vivint security system, your professional installer creates a primary user account from the Vivint control panel.
- Get your remote access invite: After setting up the primary user account, the professional installer also sends a “remote access invite” to your email address. Using this email, you can connect your Vivint account to your control panel.
- Click the link in the email: Open the remote access invite email, and click the link. It will prompt you to set a password for the Vivint account associated with your email address.
- Log in to the Vivint app: Go to your mobile device and open the Vivint app. With the app open, log in to your Vivint account using the email and password you linked to your control panel in the previous step.
Adding Users to the Vivint App
Multiple people will likely need access to the smart devices in your home, but that doesn’t mean you need to give them access to everything. When you add a user with the Vivint app, you get to set their permission levels. That means they can control only what you let them. To add new users to the Vivint app, follow the below steps.
- Open the Vivint app: Go to your mobile device’s home screen and open the Vivint app. Press the shield icon in the menu at the bottom of the screen.
- Select “Add User”: Press the three-bar icon in the top-left corner of your screen. Select “Users,” then “Add User.”
- Input the user’s name: When you click “Add User,” a window to input the user’s name and four-digit PIN will show up. That’s how they’ll access their account.
- Allow app access: After creating the account, slide the “Allow Mobile Access” toggle to the right so they can access the Vivint app.
- Set permissions: You can give the new user admin permissions by sliding the “Admin” toggle to the right, or you can fine-tune their permission level from the “Users” screen you navigated to in Step 2. Once on the “Users” screen, just select the user’s name and adjust the permission toggles based on what they need to access.
Best Practice: There’s a rule in cybersecurity called the Principle of Least Privilege, which states that users should have the fewest privileges necessary to fulfill their Take the concept to heart when giving permissions to additional users by limiting their permissions as much as possible. Of course, they still need enough permissions to do everything they need to in the app.
Using the Vivint App
Once you get comfortable using the Vivint app, it’ll quickly feel like second nature. With a bunch of different screens, though, it can feel a bit overwhelming the first time you open the app. So I’ll guide you through every screen you’ll use.
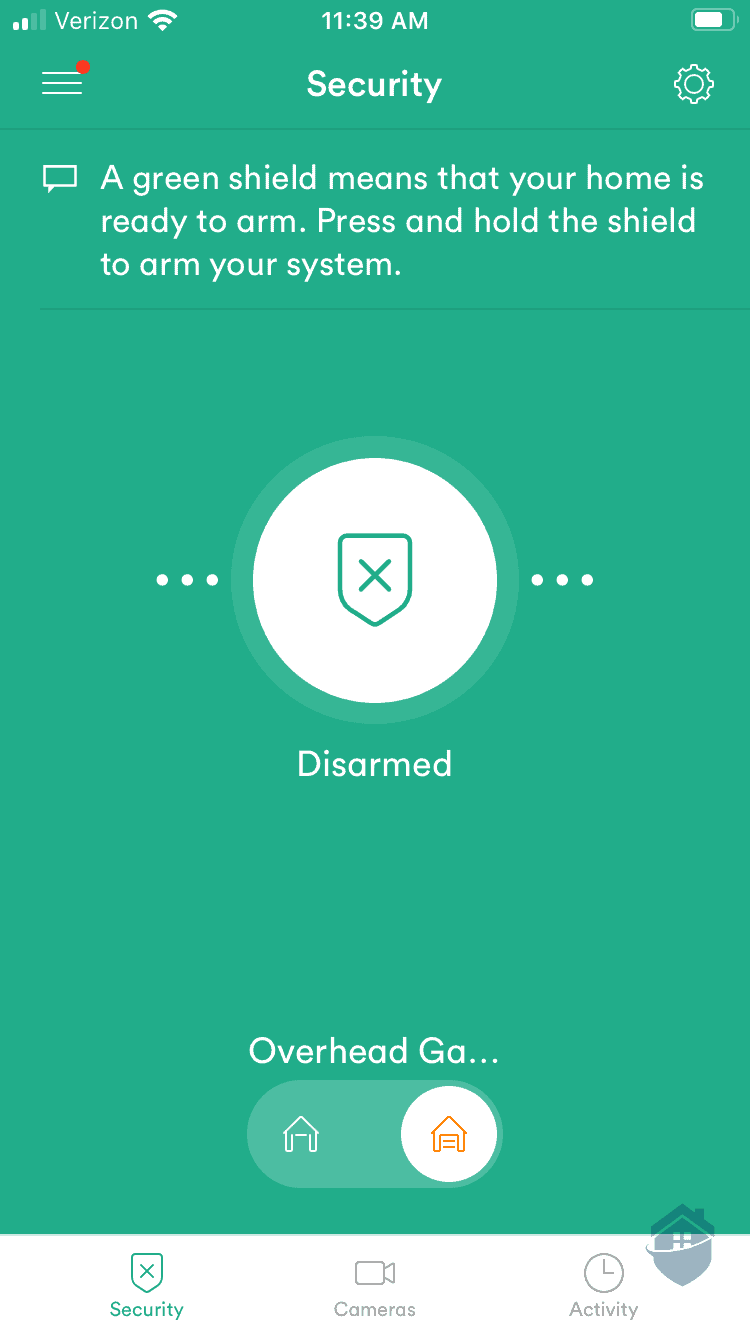
Security Center
Acting as the home screen of the app, you’ll use the security screen as your home’s digital command center. From the security screen, you can navigate to the other screens and perform essential security actions.
- Arm and disarm your security system: Tap and hold the shield icon at the center of the screen. Dragging it to the left arms your system for Stay Mode, which means you’re staying home and it should ignore motion sensors. Dragging it to the right fully arms the system, which is perfect for when you’re leaving the house. To disarm the system, move the shield back to the center and drag it down.
- Control smart locks and garage doors: Swipe down to reveal toggle buttons for each of your smart locks and the garage door. Toggling to the right locks the device, while toggling to the left unlocks it.
- Sound the alarm: In case of emergencies, you can trigger the alarm by tapping the speaker icon in the top-right corner of the screen. Tap it again to turn off the alarm.
>> Check Out: Smart Lock Buying Guide 2026
Thermostat Control
This screen gives you full control over your Vivint Smart Thermostat. To access it, tap the thermostat icon on the home screen.
- Change between Heat and Cool Mode: You can switch the thermostat between Heat and Cool Mode, and set different temperatures for each mode. Use the “+” and “-” buttons to set the desired temperature for each mode.
- Control fan settings: By pressing the “Fan” button in the bottom-right corner, you can toggle the fan on or off.
- Choose a program: Programs are predefined settings for your thermostat. They adjust the fan settings or set the thermostat to Heat or Cool Mode or a specific temperature.
Security Cameras
On this screen, you can see everything your security cameras see and use all your cameras’ features.

Viewing the Vivint Outdoor Camera in the App
- View live feed: The default view is the live footage from your cameras or Vivint video doorbell. You can touch a video feed to interact with it and swipe up from the bottom of the screen to record clips.
- Review past footage: Use the “Rewind” button to review past recordings. You can also record clips while looking at past recordings.
- Capture a snapshot: Sometimes you need only a picture of what your camera sees. To take a snapshot, press the camera icon and the Vivint app takes a picture of the current feed you’re looking at.
- Use two-way audio: If your camera is equipped with a speaker and supports two-way audio, you can talk through your security cameras by pressing the microphone icon.
- Adjust camera settings: Press the gear icon in the top-right corner of the screen to adjust settings for each camera.
>> Learn More: Best Home Security Cameras of 2026

Vivint App – Doorbell Chime Settings
Devices
Here you can control and adjust settings for all your smart home devices, such as smart lights and appliances. You’ll also find controls for the Vivint Car Guard, which allows you to identify mechanical problems and check your car’s location, gas level, battery condition, and recall alerts.
Activity Monitoring
This screen provides a detailed log of every event that affects your Vivint system. It shows you the date and time of every event your security system notices, as well as every interaction with your smart devices. That includes smart door locks locking or unlocking, security cameras detecting motion, any changes to your security system settings, and much more.

Vivint App Event Recordings
You can use the log to find out when your kids get home from school, monitor when pet sitters arrive and leave, or find out who keeps changing the thermostat settings. Press the filter icon in the top-right corner to sort your activity log based on the date and time of an event or the type of activity recorded.
Connecting Devices to the Vivint App
A smart home security system is only as smart as the devices connected to it. The Vivint app acts as the central nervous system for your smart security, but it first needs to learn to communicate with your smart devices. That’s where the Smart Hub panel comes in.
Think of the Smart Hub panel as the party host, introducing new guests to an existing crowd. Once it makes the introductions, the existing crowd can tell the new guests exactly what to do to fit in. The professional installer for your Vivint system should help you set up your primary connection — kind of like the first invite to a party. We’ll show you how to add new devices after the initial setup.
Did You Know? Vivint offers compatibility and integrations with a bunch of third-party smart devices.
Step 1: Disarm Your Vivint Security System
Before you can add a new device, you need to disarm your security system. That will let new connections be made between your Smart Hub panel and the new device. It will also prevent any accidental alarms. You can disarm your security system from the home screen of the Vivint app.
Step 2: Power Up Your Device
Plug in your new device and give it a few minutes to power up. While you’re waiting, you can daydream about how much easier your life will be once you connect the device to your Vivint setup. Or you could make a cup of tea if that’s more up your alley.
Step 3: Go to Your Smart Hub Panel
Once your camera is powered up, head to your Smart Hub panel. From the home screen, tap the three-dot icon in the bottom-right corner. That will open a menu of options.
In the menu, press the “Devices” button on the left side of the screen. For security purposes, you’ll be asked to input your PIN. It’s the same PIN you use to disarm your security system from the Smart Hub panel. Once you input your PIN, you’ll be on the “Devices” screen, which lists all your currently connected devices.
Step 4: Add Your New Device
Now that you’ve made it to the “Devices” screen, there should be an “Add New Device” button on your screen. Pressing the button will send you a few prompts to set up the new device. First you’ll need to select the type of device you’re adding, such as a smart light, smart lock, or smart security camera. Keep following the prompts until you reach the end.
Automating Your Home With the Vivint App
To make the most of your smart home security system, you need to automate tasks to get them off your plate. You can customize your security system to respond to specific conditions, notify you of defined events, and set up shortcuts that bundle actions together. Let’s dive in and start making your life easier.

Vivint App Customized Recordings
Creating Custom Routines
A custom routine is how you automate a specific portion of your home. They define conditions that need to be met for a specific action to take place. As a basic example, you could set your smart locks to lock and unlock at specified times. For a more advanced example, you could set your driveway security camera to record any time your car turns on.
Here’s a step-by-step guide for creating your first custom routine:
- Open the app: Of course, you need to open up the app before you can create a custom routine.
- Navigate to custom actions: From the main screen, press the three-bar icon in the top-left corner of the screen, and then select “Custom Actions.” When you open it, you’ll find a few predefined rules you can turn on or off if you want.
- Create a new rule: Press the “+” icon in the top-right corner of the screen to start the process of creating a new rule.
- Set the action: Specify the action you want your smart devices to take when conditions are met. It could include locking or unlocking a door, turning on a security camera, or even triggering your security system’s alarm.
- Define the condition: Set the conditions that need to be met for the action to take place. A condition could be an unlocked door at a specific time, for example, or a motion detector triggering.
- Finalize the rule: With the action and condition defined, finalize the custom rule. Go back into the “Custom Actions” menu to toggle the rule on or off.
FYI: According to Energy Star, using your smart home devices through automated workflows can reduce your energy bills. Automating your home saves you money too!

Vivint App – Custom Actions
Customize Notifications
In addition to automating actions based on conditions, you can also set triggers for the Vivint app to send push notifications. The notifications alert your phone, keeping you up to date on your home’s activity regardless of your location.
We found setting up a custom notification straightforward. Start by going to the “Custom Actions” screen and selecting the “Notifications” tab. From there, tap the “+” icon and follow the prompts to create a new notification. Just like with custom routines, you'll define a condition that triggers the alert.
>> Read About: The Top Home Security System With a Mobile App
Creating Shortcuts
Do you find yourself regularly turning on all your kitchen and dining room lights when you cook dinner? Do you always lock every door before bed? In either scenario, shortcuts will make your life easier.
A shortcut groups multiple actions together in a single button so you can turn on multiple lights, lock all your doors, or turn on groups of security cameras.
- Navigate to shortcuts: Open the Vivint app and press “Shortcuts” on the home screen menu. Select “Settings.”
- Add a shortcut: Press the “+” icon in the top-right of the screen to start creating a new shortcut. You’ll need to come up with a name for your new shortcut.
- Set actions: Choose all the actions you want to happen when you activate the shortcut from the prompted menu. It shows all the actions you can group together.
- Create the shortcut: After you select all your actions, hit “Create Shortcut” to add a new shortcut to the “Shortcuts” screen.
With those three home automation features, you’ll save time and make your life a bit easier. They’ll also make it way less likely for you or your family to leave without locking the doors or arming the security system. And even if they do, you can take the actions remotely with the Vivint app.
Wrapping It Up
Now that you know how to use the Vivint app, you can take full control of your Vivint smart home system and your other smart devices from anywhere. It acts as the mobile brain to your home, keeping you updated on any new activities and alerting you of any events. You can even start automating your home to really enter the future of smart home technology.
The Vivint app puts a lot of control in your pocket. Whether you're locking doors remotely, checking in on camera feeds, or letting automation handle the routine stuff, we think it's a useful tool for making your home both smarter and safer. Dig in, explore the features, and let it work for you.