Reolink E1 Outdoor Camera Review
This camera has eyes everywhere, with a sharp 5MP image sensor and slick pan-tilt-zoom action.

SafeHome.org may receive compensation from some providers listed on this page. Learn More
We may receive compensation from some providers listed on this page. Learn More
This camera has eyes everywhere, with a sharp 5MP image sensor and slick pan-tilt-zoom action.

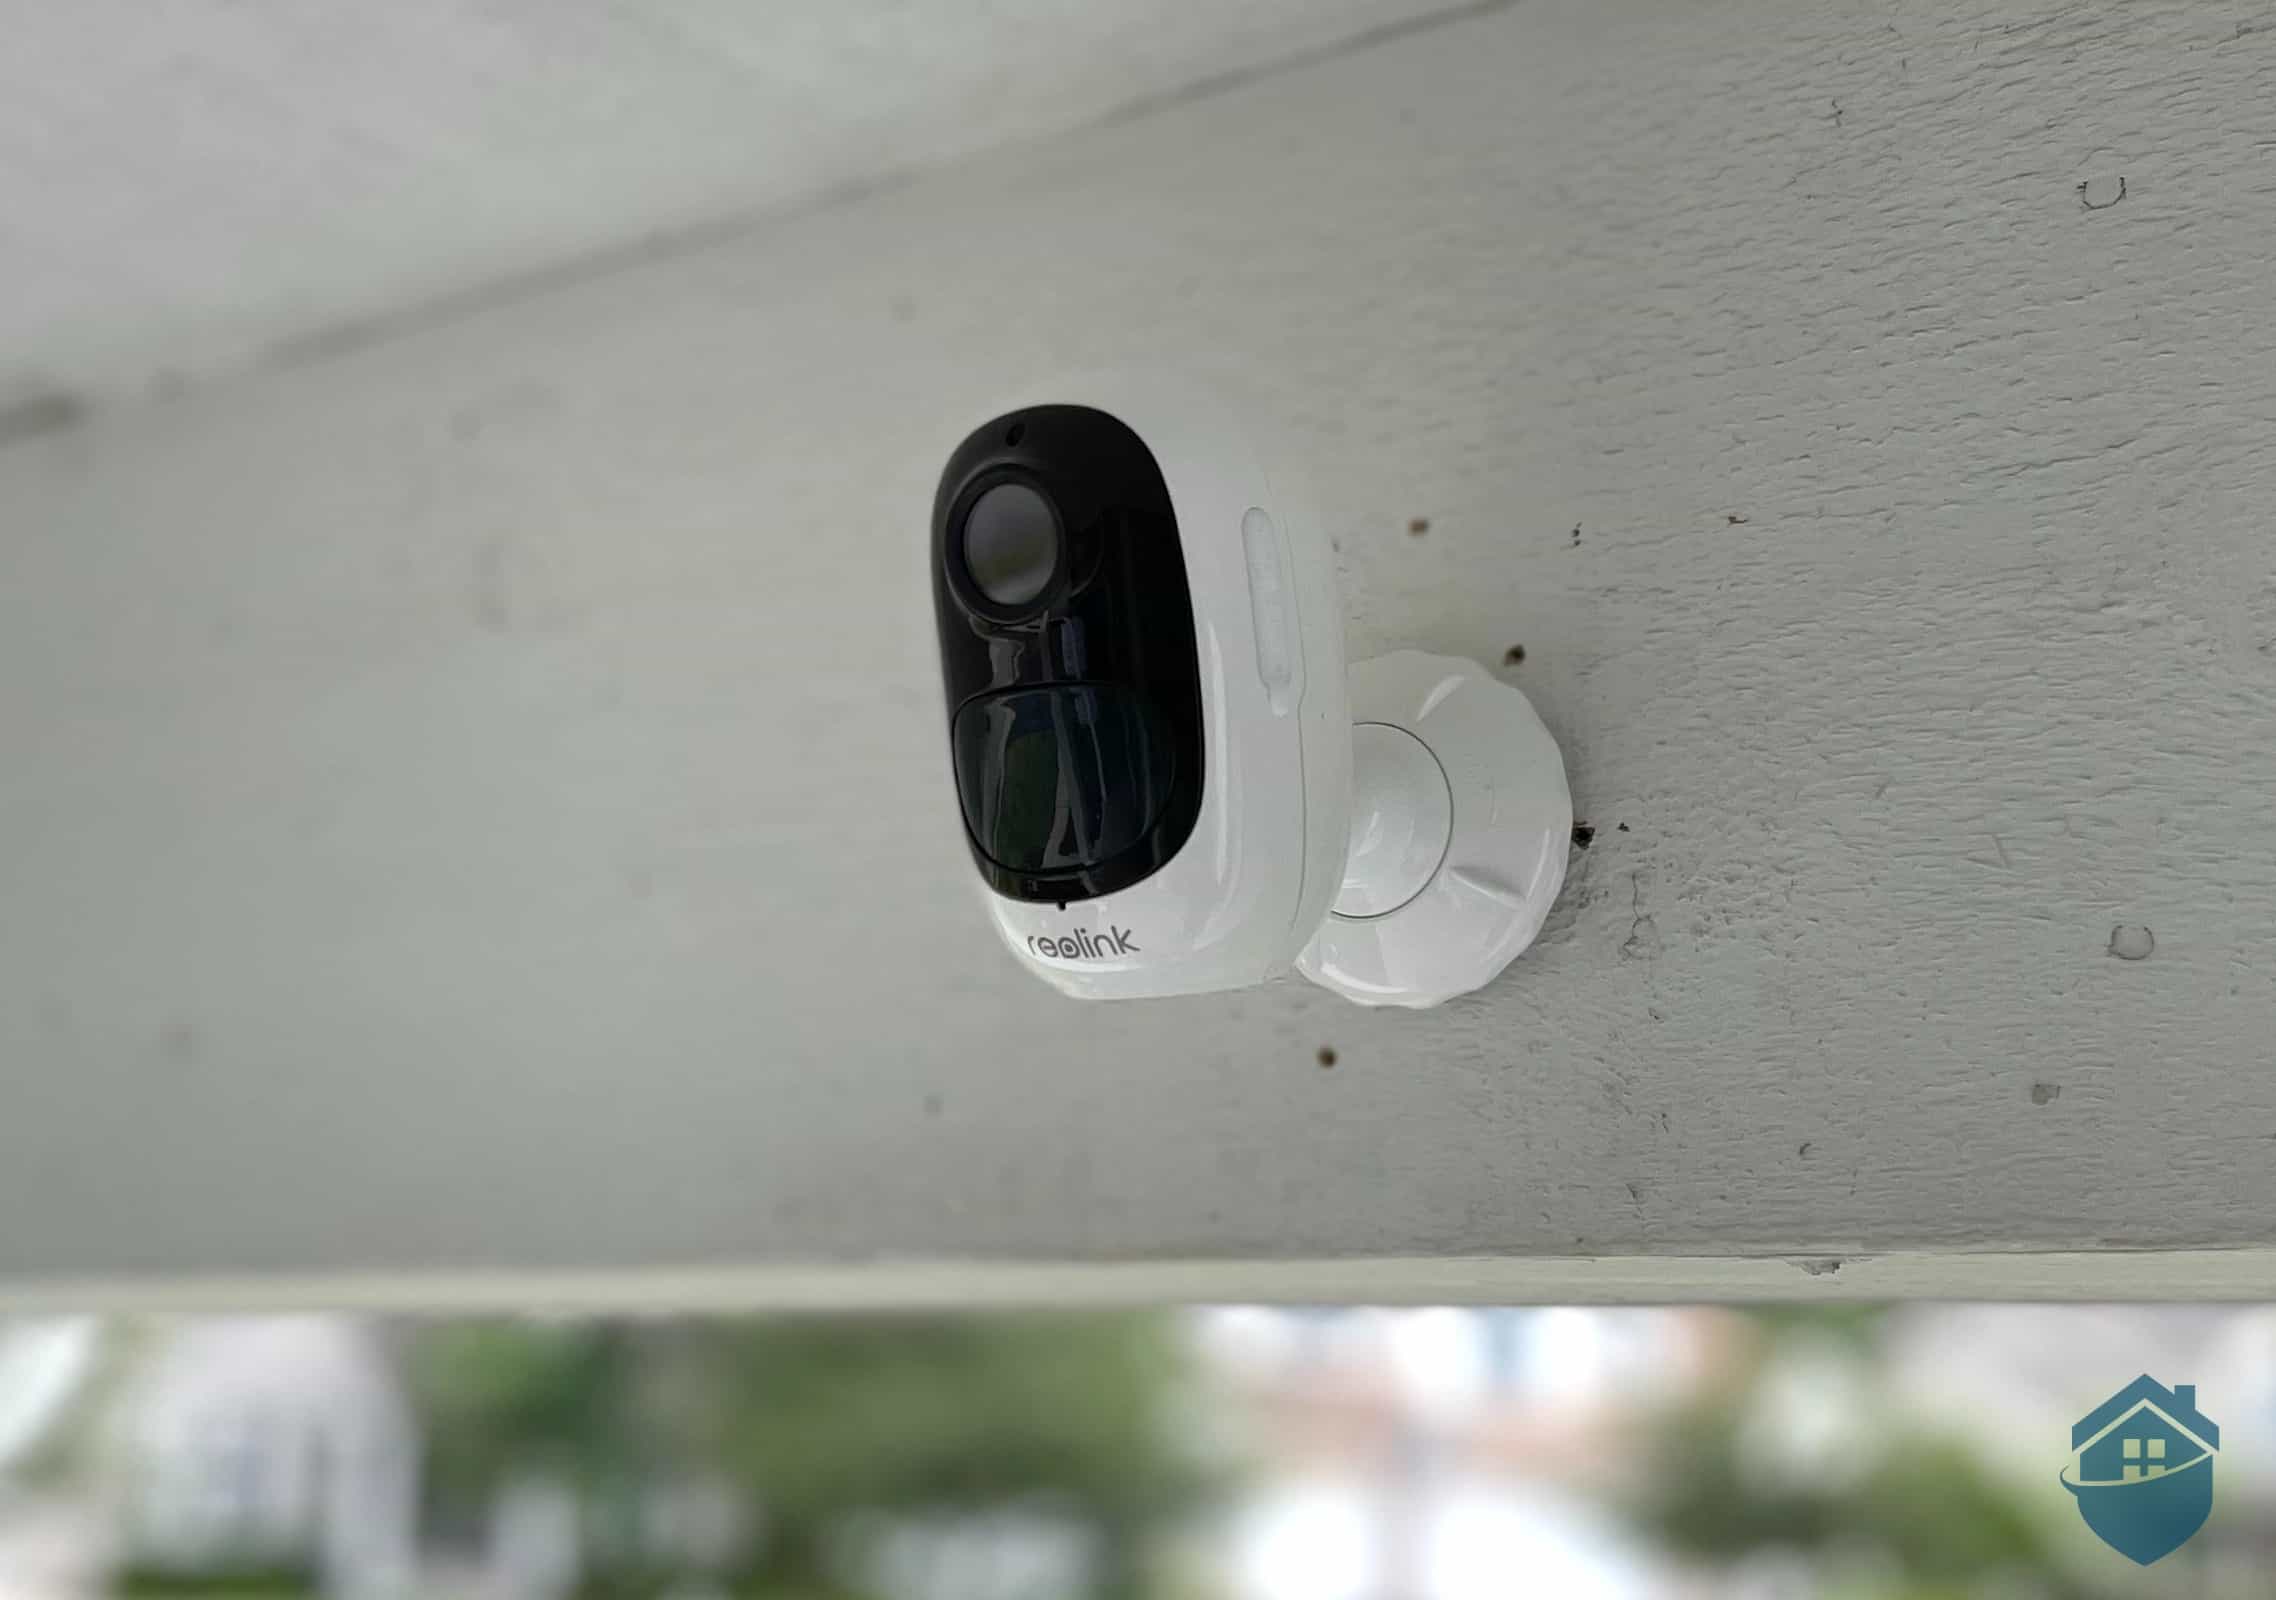
Reolink E1 Outdoor Installed
The original Reolink E1,1 one of numerous camera types our team has reviewed from the Shenzhen-based tech brand, quickly became a standout when it was released in 2019. As a high-resolution pan-tilt-zoom (PTZ) camera that can cover a whole room, we knew we’d get a great deal of use out of a camera like this. And for a price that typically hovered between $32 and $46, we had a pretty good deal on our hands, too.
There was one drawback to our otherwise pleasant initial E1 experience, though. It’s only built for indoor use, so we couldn’t get a feel for how our E1 would handle in natural light.
Fast forward a couple years, and we’re now gifted with the E1 Outdoor: it’s everything we loved in the original E1, only with a weatherproof construction, motion-activated LED spotlights, and extra Ethernet2 capabilities. This gave us the chance to test out the camera’s capability outside our home.

Reolink E1 Outdoor in the Corner of the Porch
With that in mind, we dove headfirst into our new E1 Outdoor. We noted right away that at $100, the E1 outdoor is more than double the cost of the original E1, so we did have slightly higher expectations this time.
We also considered Reolink’s overall reputation and our experience reviewing the Argus 3 and other Reolink cameras, noting how this camera responds and communicates with other devices in our home, and with the Reolink mobile app.
There’s lots more to unpack here, so let’s get started.

Reolink E1 Outdoor Box
Reolink keeps it simple with their packaging, but inside, things are a bit more complex than previous Reolink camera releases. Since this is a wired camera with an option for Ethernet (PoE) connectivity, we knew we were going to have to be smart and strategic about where and how we installed the camera, judging by the abundance of power cords and cables.

Reolink E1 Outdoor Equipment
Wiring our devices usually gives us a more stable wireless connection, but it’s not always the best look aesthetically. Some creative handiwork might be required here.
That said, if you have an Ethernet port in your home – you might find one in the back of your Wi-Fi router, or it might be wired into your home – we found that E1 makes a decent PoE camera, too. Network stability is super important in a security camera, and wiring it through an Ethernet port will get you more stable communication.
Pro Tip: With the E1 Outdoor, we recommend paying special attention to the distance between the camera and your Wi-Fi router, as the farther out you go, the weaker your signal might be. Or, consider a wire-free system with a hub like the Arlo cams we reviewed recently.
All this is to say, this camera takes a bit of preparation and forethought to get online. But it’s never a bad idea to spend time ensuring you’re installing the camera in the right place, so we rolled with it.
Like the majority of Wi-Fi cameras in our review lineup, setting up the camera through its mobile app is often the easiest part of our installation. It’s made to find a Wi-Fi signal in our home and pair it to our phone with little intervention.
It was easy as it could have been during our tests of the versatile Argus 2 cam, too. When we pivoted to reviewing the Argus Eco, another nice outdoor cam from Reolin, this took a bit longer because of where we placed it.
With E1 Outdoor, this went as well as it should – although we had to backtrack just for a moment after the first attempt failed.
Pro Tip: With Reolink, setup tends to take longer than when we review Ring security cameras and other more recognizable brands. Some cameras are just more intuitive than others, so if you really want to avoid setup hassles and lags, we suggest sticking with names you recognize. That said, as you’ll see, there’s lots to love about the Reolink E1 model.
It was time to get this camera installed. But first, we had to make a choice. Using the camera’s included Ethernet port, as it turns out, wasn’t conducive to our home’s layout, no matter where we ultimately installed it.

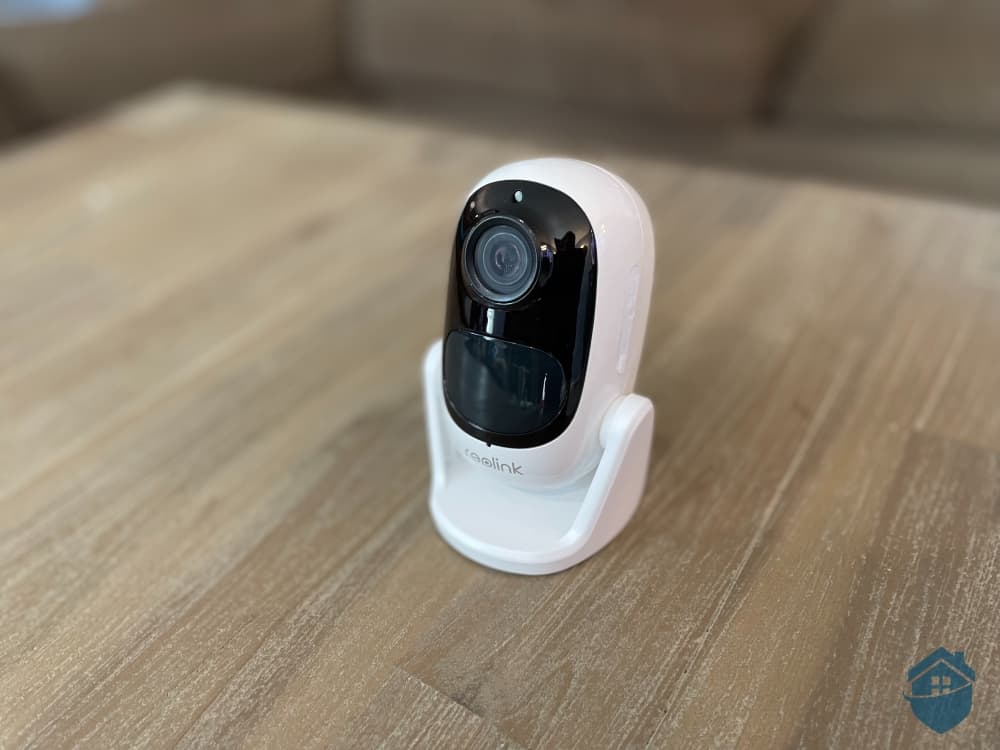
Reolink E1 Outdoor in Hand
So we chose to wire it. We were initially concerned we’d have more problems connecting the E1 using this option, just because it’s rare to find a $100 outdoor camera with 100% smooth performance from beginning to end.
But aside from that momentary hiccup and a software upgrade that took about seven or eight minutes, we were in business pretty quickly.
Taking our E1 Outdoor’s body shape and PTZ functions into account, we decided we’d hang the camera from the ceiling of our wrap-around porch, which basically encompasses the entire front layout of our home.
Because if there’s one thing we love about PTZ cameras, it’s that they allow us to monitor such large areas at one time. This can be a great advantage over static-lens cameras like Blink, a low-cost brand with solid equipment and the backing of Amazon.
FYI: As we noted in our Blink camera review, static-lens cameras are popular and typically inexpensive, but in terms of coverage, you might need, say, two or three Blink cameras to do the work of one Reolink E1 camera. Just something to keep in mind.
This E1 Outdoor also proved a bit more difficult to install than the simpler, slimmer Blink cameras. That’s mostly due to the wires, which – if you couldn’t tell – we’re not particularly fond of in security cameras.
With the Reolink E1, we essentially have one mounting bracket that does several things. Hint: this is the time to swallow your pride and open the instruction manual, because it’s important to learn how the bracket works so you’ll get the installation you want. If you’d like it flush with your ceiling, like ours, the bracket can be taken apart and used as a ceiling bracket, like so:

Reolink E1 Outdoor Bracket
So now, we had little more to do but fix the camera to the bracket. This isn’t necessarily any more complex than any other camera, but again, we do think it’s wise to familiarize yourself with the ins and outs of an installation like this.
When all was said and done, we had a nice-looking device patrolling the porch like a champ. We didn’t even mind the extra muscle required to puncture our ceiling with the drill. (One of us should probably start lifting, though.)

Close look at the Reolink E1 Outdoor
As we watched our E1 Outdoor camera make a nearly 360-degree rotation from its humble perch, we thought a word of warning would be wise here: don’t expect to be blown away right off the bat. Past experience tells us that this one would still need a little more time to fully wake up and acclimate to its new environment.

Testing the Reolink E1 Outdoor
To help this process along, we slightly impatiently, not-at-all childishly began playing with the camera’s PTZ controls in the app as if the phone was a joystick to a video game console, hoping to feel super heroic and powerful as the camera panned, tilted, and wound its way around our front porch in response. You know, all in the name of research!
We recorded a quick clip of the Reolink E1 Outdoor camera in action:
All stacked up, we’d rate picture quality in our E1 Outdoor quite high – a couple notches higher than the Zmodo 1080p cam we tested in that same spot. With Reolink, our E1 is considered Super HD, which looks quite lovely when we manually set it to record in max 5-megapixel resolution.3 But with all the fluctuations and glitches of wireless home internet these days, we usually set our cameras to record fluently and keep it as our default, and we recommend you do the same. Otherwise, you might have app crashes, loading failures, and the like.
Knowing video quality is one of the biggest factors in choosing the right security camera, we’re pleased that a camera like E1 Outdoor, affordable and reliable as it is, was able to roll with those fluctuations pretty smoothly.
It took a little time, but our Reolink E1 Outdoor got accustomed to its surroundings pretty well as we continued our series of tests and simulations. It’s at least smart enough to know the FedEx delivery guy from a stray cat paying us a visit, as we saw here:
Having channeled enough of our inner nerd for the day, we turned our attention to more pressing matters: how well does this thing see at night?

Reolink E1 Outdoor at Night
This, we learned, would be up to us. Factors like outdoor lighting, signal strength, and the proximity of the object or activity to our camera all affect performance, and at night, this was especially evident to us.
Within the app itself, we can control what kind and how much lighting we want our camera to emit, too. Do we want IR lights to give a little more visibility to dimly lit areas, or are we looking for a super-bright spotlight to act as a deterrent to someone who might be curious about what that FedEx guy just dropped off on our porch?

Reolink E1 Outdoor – Toggling the Spotlight
Both can be accomplished with the E1. We had our IR lights turned on and the motion-activated spotlight turned off one evening while we were all hanging on the porch, but when night fell, we switched it up; so as the kiddos tiptoed off to bed, we knew that spotlight would be ready to go if anyone else should plan to make an unsolicited visit.
FYI: It wasn’t so easy to find the spotlight controls for E1 Outdoor in the Reolink app. They’re under the advanced tab, to save you some trouble. The app, we’ve found, is otherwise pretty intuitive.
This is where we like to test how sensitive our security camera’s motion sensor is. Generally, we’ve found that they err on the sensitive side pretty much across the industry.
We usually know our cameras are too sensitive soon as we get them online and start getting flooded with alerts on our phone at the slightest breeze, or at every car passing by, or at every bird landing on our stoop (though those can be lovely to watch, FYI).
When that happened this time with our E1 Outdoor, we knew what to do. We simply moved the sensitivity slider to the left to reduce those alerts and (hopefully) end up with clips we’d actually want to see. It didn’t solve the problem altogether, but it was a helpful step.

Reolink E1 Outdoor Motion Sensitivity
We’ll be brief here, but we do think it’s worth mentioning that the Reolink E1 lists a feature on the box called “auto tracking.” This, as we’ve seen when we tested Google Nest Cams, is when the camera automatically moves to capture the action and follows it until it stops.
Or … is it? We poked around and, frankly, couldn’t tell exactly what this feature did, or if it was present at all, or how to access it. We did plenty of manual tracking, to be sure. But we didn’t see a way to automate it.
Just a word of caution, as some brands can slip confusing language into their packaging that makes it difficult to understand what you’re actually getting.
Did You Know? The E1 series offers continuous recording, which many other Reolink cameras don’t have. With E1 Outdoor, we can choose either 24/7 recording or motion-activated clips; we chose the latter to save storage space, but again, it’s your call.
As we mentioned earlier, E1 Outdoor costs around $100. Its predecessor, the original E1, starts at $36, which is a pretty gaping price disparity; but we also know the outdoor version brings a lot more to the table.
There are tons of “cheap” cameras that work just fine, but we always worry about weather damage, falls, or theft4 with outdoor security equipment. So we don’t mind spending a bit more for something that’s more durable and that gives us more peace of mind.
The small and compact Wyze system of $19.99 cameras, for example, worked nicely for us and with very little prep. But would we trust them out in the elements all year round? Probably not.
For more comparison, we broke out a cost matrix below, but you can also see our Reolink’s cameras and pricing page for further information.
| Reolink Camera | Type of Camera | Key Features | Price |
|---|---|---|---|
| Argus 3 Pro |
|
|
$109.99 |
| Argus 3 |
|
|
$109.99 |
| Argus 2 |
|
|
$94.99 |
| Argus Pro |
|
|
$69.99 |
| Argus Eco |
|
|
$62.99 |
| E1 |
|
|
$39.99 |
| E1 Outdoor |
|
|
$99.99 |
Like many Wi-Fi and wireless cameras out there, Reolink essentially offers three ways to back up our recordings with E1 Outdoor: a MicroSD Card, Reolink Cloud, or a Reolink NVR. For today, we just chose a standard ($3.49 per month) cloud subscription so we had some good clips to work with.
This is a fee we’re comfortable paying to store videos in the cloud, but keep in mind that you’ll likely end up paying more – either through internal storage or the cloud – if you want to keep the camera recording 24/7. (For more, take a look at our best cloud security cameras guide.)
The costs add up for sure, but it might be worth considering. After all, there might be some really crucial evidence in there that you’ll want to keep. You never know when, say, a rash of package thefts takes hold in your neighborhood and you suddenly need to step up the surveillance, or keep a few more clips to compare notes with neighbors. Or, what if you just love the E1 Outdoor so much that you’ve decided to buy two more? Or an entire Reolink camera system for that matter?

Reolink Argus 3, Argus 2, and Argus Eco cameras
For continuous recording,5 we recommend purchasing an NVR to house all that data. The Reolink NVR is not any different from a standard recorder, and just as ideal for storing large amounts of video as Swann’s NVR camera systems and packages. While their cams didn’t earn big praise for design or sophistication when we unpacked a Swann camera system, we do enjoy using our television as central command for all of our cameras now and then. And, Swann happens to be a pretty affordable brand.
Here’s a rundown of Reolinks monthly subscription plans for cloud storage:
| Basic | Standard | Premier | Business |
|---|---|---|---|
| 1-camera limit | 5-camera limit | 10-camera limit | 30-camera limit |
| 7-day storage | 30-day storage | 30-day storage | 60-day storage |
| 1 GB of storage | 30 GB of storage | 80 GB of storage | 150 GB of storage |
| Free | $3.49 per month | $9.99 per month | $14.99 per month |

Reolink E1 Outdoor Closeup
While we’re well acquainted with Reolink cameras by now – it’s a pretty massive and varied brand – E1 Outdoor came to us with a few curveballs. While we’re grateful for the added convenience of person/vehicle detection, we did find a few areas of concern, like the absence of auto tracking and a slightly laggy performance between app and camera during busier times of the day.
But for a camera just under $100, from a brand we already know to be reliable, we felt confident and secure with one camera covering such a large area. We liked being able to pan and tilt the lens to our will, as we zeroed in on different targets and scenarios during testing.
All told, this is yet another well-made, reliable Reolink camera that we recommend for relatively low-cost monitoring and motion detection.
No, this camera is strictly wired, so unfortunately we don’t have the option for wire-free installation. Reolink’s Argus camera collection or even a Blink system might be a better fit if you’re looking for wire-free cameras.
Yes. We got clear communication out of our E1 Outdoor in our audio tests. It’s a simple function; all you have to do is press down to talk and let go to hang up.
Yes. It’s rated IP65 for weather protection, and as Midwesterners, we’ve found it handles wind quite well.
Yes. All corresponding Reolink cameras, including E1 series, offer access to Reolink Cloud. The free “basic” option includes 7-day storage and covers one camera.
Getting in touch with someone in customer support at Reolink has never been difficult, but we’ve run into issues getting specific questions about the cameras and features through live chat and email. Our suggestion? Use the good old-fashioned telephone.
PR NewsWire. (2019, June 6). Reolink Launches Full-Featured and Affordable E1 Pro Pan Tilt Smart Home Camera. Reolink Innovations Ltd.
prnewswire.com/news-releases/reolink-launches-full-featured-and-affordable-e1-pro-pan-tilt-smart-home-camera-300863308.html
Allen, J. (2021, Feb. 21). Wi-Fi vs. Ethernet: Which Do You Need? Lifewire.
https://www.lifewire.com/wifi-vs-ethernet-which-one-should-you-use-4684496
Honovich, J. (2009, Jan. 29). What’s the Difference Between HD and Megapixel Cameras? IVPM.
https://ipvm.com/reports/whats-the-difference-between-hd-and-megapixel-cameras
Siegel, J. (2020, March 11). How to Protect Wireless Security Cameras from Theft & Damage. Frontpoint.
https://www.frontpointsecurity.com/blog/how-to-protect-wireless-security-cameras-from-theft-damage
Hearn, P. (2019, May 3). Motion-Activated Security versus Continuous Recording: Facts to Consider. Corporatehousingbyowner.com.
https://www.corporatehousingbyowner.com/blog/2019/05/motion-activated-security-vs-continuous-recording-factors-to-consider/