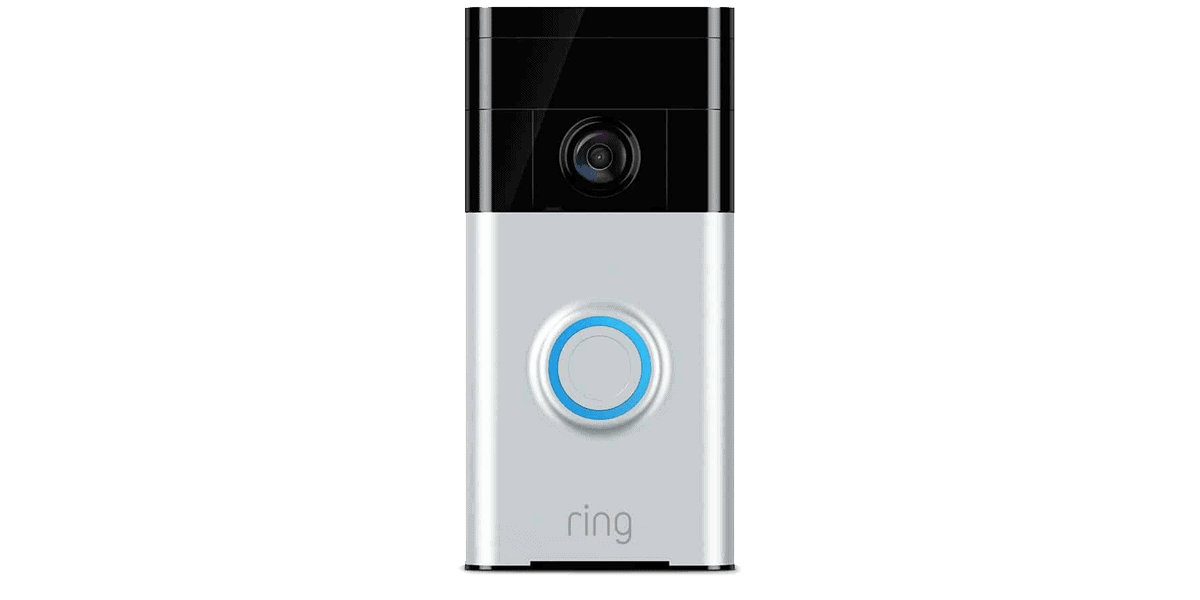
A video doorbell is a great way to secure your home’s main entryway. With a quality doorbell cam, you can see what’s going on at your front door from pretty much anywhere. You can train some doorbells, like the Google Nest Doorbell, to recognize familiar faces. And if worse comes to worst, you can shout a creep off your porch with two-way audio. Like I said, great — as long as you know how to install one!
The SimpliSafe Video Doorbell is actually one of the simpler doorbell camera installations I’ve handled. If you’re comfortable with a drill or screwdriver, can track down your current doorbell’s power source, and know the difference between a mechanical chime and its digital counterpart, you shouldn’t have any problems either.
So let’s get to it. In this home security guide, I’m going to show you how to:
- Assemble your new SimpliSafe doorbell camera
- Wire and power up your doorbell
- Get the most out of SimpliSafe’s advanced features
Did You Know? If a thief can gain access to your home from a back or side door, he’ll go for it. But usually he’ll knock on the front door first to see if anyone’s inside. This may be the best reason for investing in a video doorbell.
>> Read More: How to Protect Your Home From Burglars for Under 100 Bucks
Unboxing the Simplisafe Doorbell Camera
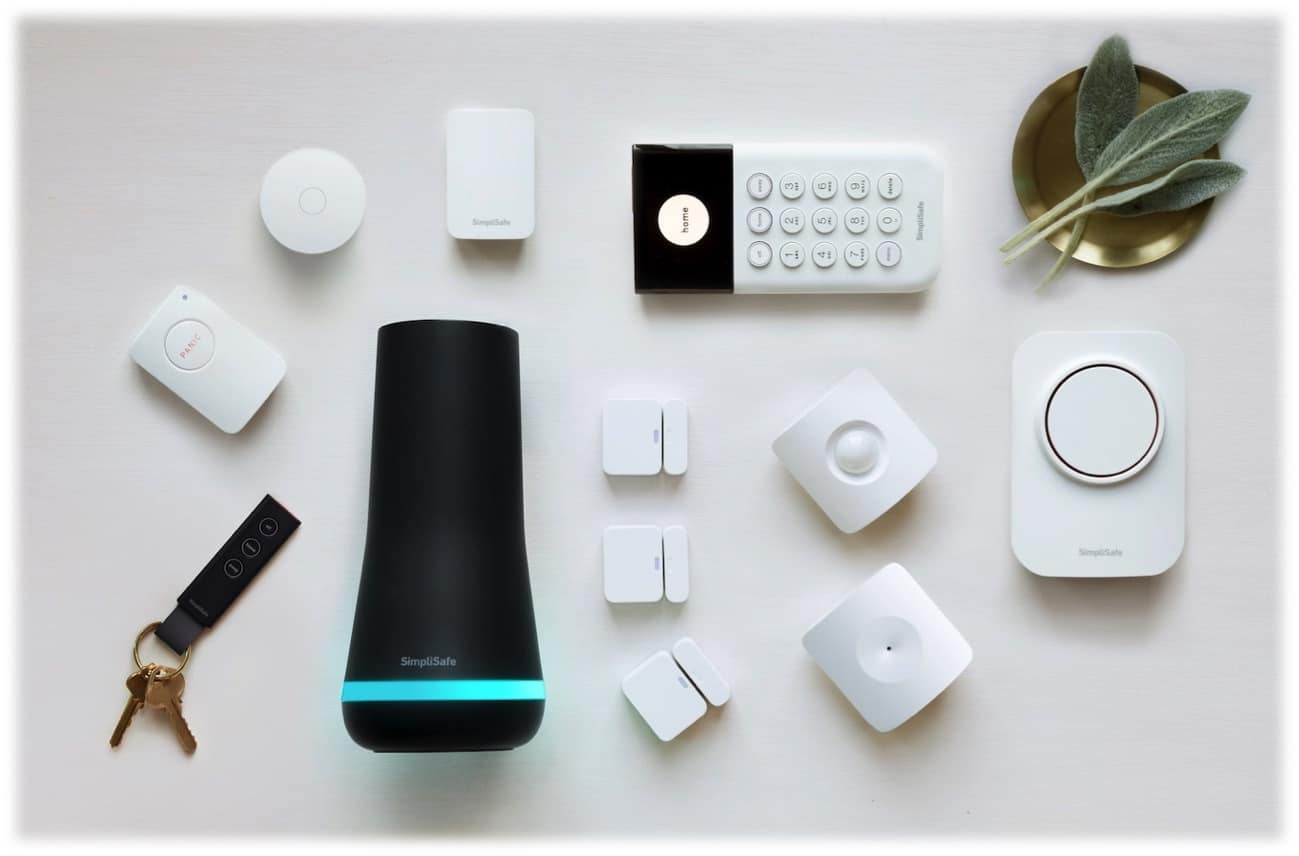
The first thing you’re going to notice — besides the pretty sleek-looking camera — is that the SimpliSafe doorbell comes with three different faceplates. The faceplate is the part of the assembly that faces the outside, by the way. Having that selection is nice because you can match your doorbell to your entryway on the spot rather than eyeball it on a laptop and hope for the best. The colors are cloud white, jade, and obsidian. The jade is actually more of a mint green.

SimpliSafe Doorbell Camera Unboxing
You’ll also find the attachment plate inside, as well as an angle plate that lets you just do that: angle your camera up or down. While the option to angle your doorbell is nice, just be careful not to angle your camera too far down. A steep downward angle might give you a good view of a visitor’s feet, but it’ll likely miss their face. The attachment plate is what you’ll attach to your house.
Safety Tip: Make sure to cut the power to your doorbell before you install the SimpliSafe video doorbell. You don’t want any electrical mishaps during installation! Be prepared to troubleshoot different switches to identify the right one. You can also use a multimeter (an electricity meter) on your doorbell connection to check that you cut the power to the appropriate circuit.
Wiring and Attaching Your SimpliSafe Video Doorbell
Like the name says, SimpliSafe installations are simple. Still, doing it right the first time is the key to saving time. So I’m going to take this step by step. The whole process shouldn’t take more than a half-hour, maybe an hour max if you’re a complete novice.
>> Check Out: How Easy Is the Installation of SimpliSafe?
1. Disconnect Your Old Doorbell
Once the power is off (see Safety Tip above), grab your drill or screwdriver and remove the doorbell you’ve already got up. Then disconnect the wires. The wires should be secured by two screws. Before you go any further, you’ll want to decide if you’re going to angle your camera or not. If the answer is yes, the angle plate is going to go on before the attachment plate.
2. Wire Your New Doorbell
If you aren’t using the angle plate, feed the wires through the attachment plate. I like to connect the wires to the two terminal screws in the attachment plate before securing the plate. It’s much easier to wrangle wires and line up your attachment plate when the wires are secure first. To do this, snake one exposed wire to the bottom of a terminal screw and then tighten it. Repeat on the second screw with the second wire.

SimpliSafe Doorbell
It really shouldn’t matter which wire goes with which screw, as long you don’t connect two wires to the same screw. You’ll also want to make sure your wires are making solid contact with their respective screws. Otherwise, your bell won’t have the juice to do anything.
>> Read More: Residential Fire Prevention and Safety Guide
3. Install the Attachment Plate
Once you’ve connected the wires to the terminal screws, it’s time to secure the attachment plate. Tighten both placement screws at the top and bottom of the plate, and then scrunch the wires into the center space so that they’re out of the way.
Pro Tip: You’ll notice that the attachment plate has a blue card at the top labeled “Clearance.” This is how much space you’ll need at the top of the attachment plate to slide the camera into place. If you have anything obstructing your clearance path, you’ll want to lower the doorbell if possible, or flip the attachment plate upside down. The angle plate could come in handy here.
Installing Your SimpliSafe Camera
Now you’re ready to slide the camera into place. This is actually the easy part. Place the camera slightly above the attachment plate, then lower it until it snaps into place.
You may be thinking that if someone wanted to tamper with your SimpliSafe doorbell camera, they’d only need to slide the camera up off the attachment plate and toss it into the bushes. No chance. That’s why you’ve got a tiny security screw and screwdriver included in the box. Don’t lose them.
To save time, I wouldn’t add the security screw until after you restore power, test the angle, and get your doorbell up and running. It’ll be one less thing you’ll have to undo if you need to change the attachment plate.
FYI: After you’re done with the assembly, don’t forget to restore power to your doorbell at your fuse box. It’s easy to forget and you’ll be scratching your head if you do.
>> Check Out: Best Home Security Systems of 2024
Configuring the SimpliSafe App
Once you’ve powered up your new SimpliSafe doorbell, the first thing it’s going to do is tell you it wants to connect to the SimpliSafe Home Security App. If you haven’t already, now would be the time to download the app from the Google Play Store or the Apple App Store. First time SimpliSafe users will have to go through the whole rigmarole of setting up an account. It won’t take long.

SimpliSafe App – Overview
All logged in? Great. Now find “Set up security system.” Tap on it. If you don’t have a SimpliSafe security system with a base station, don’t worry. Just click on “I don’t have a base station.”
>> Read About: SimpliSafe Home Security System Review
Next, tap on “doorbell camera.” The app will ask you to name the property where you’re placing the doorbell camera (“Ye Olde Castle” or whatever you want). Then it’ll ask you to choose a Wi-Fi network.
Pro Tip: The SimpliSafe doorbell camera only works on 2.4 GHz networks, not 5 GHz networks. This is the case with many smart home devices, because the 2.4 GHz network travels further and penetrates building materials better than the 5 GHz network, in most cases.
Connecting Your SimpliSafe Doorbell to Your Network
Select your network, enter your Wi-Fi username and password, and then choose a name for your camera. SimpliSafe has three default names: front door, back door, side door. That should be enough for most of us.
Your camera should be flashing white at this point. That means it’s ready for setup. The rest of the process should only take a minute or two. You’re going to need the QR code on the box for this, so get that ready.
FYI: You may have to remove the protective plastic over the camera lens and hold your phone a few inches away from the camera so that it can clearly read the QR code. This may change depending on newer generations of this camera, so always read those instructions.
Assuming you didn’t run into any hiccups with the QR code, you’re now ready to connect your camera to your network. Make sure you’ve selected the right network and that your modem isn’t too far away. 2.4 GHz networks typically perform better at longer ranges, so hopefully you won’t have an issue with your connection. Some users have reported that they needed to move their modems in order to get the camera to work, which is obviously a hassle, but Wi-Fi often is.
Once your camera’s connected to your network, you’ll know because you’ll have a live view of your front yard. If everything looks good, select “Done” and give yourself a pat on the back because you did it!
Security Tip: Don’t forget to install the security screw! If you don’t put that on, a thief can slip your doorbell right off.
>> Read More: Seven Home Security Mistakes You Can’t Afford to Make
SimpliSafe Doorbell Camera Core Features

The SimpliSafe Video Doorbell gives you a number of features right out of the box, and a few you’ve got to pay for. Here are the free ones. You can start using these immediately:
- Motion notifications that prioritize movements caused by people
- Livestreaming from the app so you can check it from your phone
- Two-way audio so you can have a conversation with whoever is at your door
- Two kinds of sensors: one that reads the heat signatures of people and one that looks for human shapes. The combination helps reduce the number of false alerts when the camera detects motion. Your doorbell camera should also ignore vehicles, which is nice if your front door faces a busy street.
- 1080p high-definition video, pan and zoom, 162 degree-wide angle field of view, and infrared night vision
Now for those paid features. SimpliSafe has subscription plans for video cloud storage starting at $9.99 per month. That gets you unlimited video recording (motion events only) and 30 days’ worth of storage. This plan also gives you a three-year warranty on your doorbell’s hardware.
>> Check Out: SimpliSafe’s pricing plans and package costs
But that’s just video. If you want the cops on your front porch pronto when a porch pirate strikes, you’ll want to check out SimpliSafe’s professional monitoring plan, “Fast Protect Professional Monitoring.” When you’ve got one of those, your doorbell is connected to a team of professionally trained agents that respond to alarms around the clock. If there’s a bona fide emergency, they’ll send the police. You’ll also get a lifetime subscriber warranty on hardware plus unlimited video storage. Just check the terms before you sign on the line.
>> Learn About: Top Security Systems With Monitoring Plans
Wrapping Up
Installing the SimpliSafe Video Doorbell should feel straightforward and practical, and shouldn’t require professional assistance, as long as you have the correct kind of mechanical doorbell already in place. With a few simple tools, you can equip your home with enhanced security that works well right out of the box.
And if you’re looking to expand beyond their doorbell camera, know that you have a lot of options with the SimpliSafe brand. Their security system is one of the easiest to install yourself. So, go ahead, embrace your inner DIY enthusiast and build that home security fortress, one SimpliSafe camera at a time.
>> Further Reading: Take Our Home Security Quiz