Best DIY Home Security Systems of 2024

Fast, easy, and affordable. These security systems that we’ve personally tested will have you up and running in 30 minutes or less.

Page Hero Image
SimpliSafe Image
SimpliSafe
SecureScore™: 9.2/10
SimpliSafe’s impressive Fast Protect monitoring, coupled with its Smart Alarm indoor camera, offers some of the most impressive protection I’ve come across in my years of covering home security equipment.
View Packages
ADT Self Setup Image
ADT Self Setup
SecureScore™: 8.6/10
ADT Self Setup is one of the hottest new DIY systems around, and for good reason. It offers equipment and monitoring services from ADT, one of the nation’s most reputable alarm companies, without the required professional installation.
877-959-7762
View Packages
Cove Security Image
Cove Security
SecureScore™: 8.8/10
10-minute, hitch-free installations don’t mean you’re sacrificing quality with Cove. With a premium Cove security system, we found you can secure your whole home with 24/7 professional monitoring and a lifetime warranty on your equipment.
View Packages
  • SimpliSafe Product Image
    SimpliSafe
    SecureScore™: 9.2/10
    SimpliSafe’s impressive Fast Protect monitoring, coupled with its Smart Alarm indoor camera, offers some of the most impressive protection I’ve come across in my years of covering home security equipment.
    View Packages
  • ADT Self Setup Product Image
    ADT Self Setup
    SecureScore™: 8.6/10
    ADT Self Setup is one of the hottest new DIY systems around, and for good reason. It offers equipment and monitoring services from ADT, one of the nation’s most reputable alarm companies, without the required professional installation.
    View Packages
  • Cove Security Product Image
    Cove Security
    SecureScore™: 8.8/10
    10-minute, hitch-free installations don’t mean you’re sacrificing quality with Cove. With a premium Cove security system, we found you can secure your whole home with 24/7 professional monitoring and a lifetime warranty on your equipment.
    View Packages
  • Alder Product Image
    Alder
    SecureScore™: 8.8/10
    Alder’s equipment was clearly built with DIYers in mind. Its easy-to-use app makes setup a breeze, and its lightning-fast response times ensure peace of mind.
    View Packages
  • Frontpoint Product Image
    Frontpoint
    SecureScore™: 8.7/10
    No fuss, no muss, no tools, no holes. And, if you need a helping hand, Frontpoint’s exceptional customer service team can jump in too.
    View Packages
  • abode Product Image
    abode
    SecureScore™: 8.0/10
    View Packages

Best DIY Security Systems of 2024

SimpliSafe Essentials Kit

SimpliSafe Essentials Kit

It used to be that home security systems required professionals to come out to your home and hardwire a new system. This was a time-consuming and disruptive process — and prohibitively expensive.

The good news is that’s no longer the case. There are DIY-friendly security companies making easy-to-install security equipment that won’t require a hard hat or an electrical engineering degree to get up and running. Some of the systems I’ve included here can be set up in about 30 minutes. I’ve personally tested each one, and today I’m sharing my top picks. Let’s jump in!

Our Methodology

Transparency is important, which is why I want to be totally clear about how this list was created before we get into the details.

First, I conducted extensive research on each provider to learn more about its services and reputation. I paid specific attention to reviews that complained about difficult or confusing install processes and ended up disqualifying a few right out of the gate.

I then put these systems to the test myself. I installed each one of them in my home and lived and worked with them for about two weeks to get a sense of how they performed. I stress-tested each piece of equipment for durability, and I got a clear look into the system’s overall functionality.

Want to know which providers made the cut? Keep reading to find out.

  • 1 SimpliSafe - Best Monitoring

    SimpliSafe Product Image
    SecureScore™ 9.2
    Customer Service
    9.0
    Value
    9.4
    Equipment
    9.0
    Features & Technology
    9.2
    Ease Of Use
    9.2
    SecureScore™
    9.2

    A Quick Look at SimpliSafe

    SimpliSafe was originally designed for renters, which is why it takes the top spot on my list of the best security options for apartments, but it’s since expanded its offerings to cover just about any dwelling you can imagine. Its equipment is all well-designed and extremely easy to install, which I’ll talk a little more about below.

    SimpliSafe’s standout feature, at least in my opinion, is its new Fast Protect Monitoring. When coupled with one of its new Smart Alarm indoor cameras, a SimpliSafe technician will be able to monitor a live feed of your home in the event of an emergency and relay that information to authorities — and even speak to you while everything’s happening through the camera itself. This type of response is unique, and SimpliSafe is one of the few services out there I’ve seen offer anything like it.

    SimpliSafe equipment

    SimpliSafe equipment

    • Affordable, easy-to-use equipment
    • Installation is a breeze
    • System is extremely responsive
    • App is well designed and intuitive
    • New monitoring is a major security bonus

    • Keypad is a little finicky
    • Mounting system could use some work
    • Some pieces of equipment are a little bulky

    Installing SimpliSafe

    Like I said above, when I reviewed SimpliSafe, I was pretty impressed with its equipment — especially the new stuff like the aforementioned Smart Alarm camera, its new carbon monoxide detector, and its improved motion detector. I had a bit of trouble connecting the keypad to the base station, but that’s actually my fault. I got a little overzealous and did things a bit out of order, which caused some problems. If you just download the app first and follow the on-screen instructions, you won’t run into any problems.

    Like most DIY systems, SimpliSafe relies on command strips to affix most of the equipment — the motion sensors, the keypad, the contact sensors — to the wall. This is a bit of a double-edged sword, especially with the heavier pieces of equipment. I understand that being able to peel and stick stuff makes SimpliSafe one of the best security options for renters, but when it comes to permanence, it’s not my favorite solution. Luckily, most of the equipment did come with mounting brackets for folks who want to drill everything into the wall. Either way, I was done with my setup in about 25 minutes.

    SimpliSafe’s Costs

    Another big selling point of SimpliSafe is its affordability. I have more on this in my guide to SimpliSafe’s pricing, but the quick version is this: It offers several equipment packages and an option to build your own. Here’s a quick rundown of them:

    Package name Number of components Price
    The Foundation 4 $244.96
    The Essentials 6 $274.95
    The Lighthouse 7 $464.93
    The Hearth 9 $394.91
    The Beacon 10 $669.90
    The Knox 13 $469.78
    The Haven 14 $509.86

    And for context, here’s a list of all of SimpliSafe’s equipment that can be used to supplement one of the above bundles or build out your own custom system. One thing to note is that you will have to buy a base station and keypad — something I’m not too fond of. The base station I can understand, but the keypad? That doesn’t make a lot of sense to me.

    Component Cost
    Entry sensor $14.99
    Motion sensor $34.99
    Glass-break sensor $39.99
    Outdoor camera $189.99
    Smart Alarm indoor camera $139.99
    SimpliCam indoor camera $99.99
    Video doorbell $169.99
    Water sensor $19.99
    Smoke and carbon monoxide detector $59.99
    Smoke detector $34.99
    Temperature sensor $29.99
    Panic button $19.99
    Key fob $24.99
    Extra-loud siren $59.99

    Keep in mind that SimpliSafe is almost always running a sale, so it’s rare that you’ll have to pay full price for one of its systems. At the time of this writing, it was offering 40 percent off any new system when you sign up for Fast Protect Monitoring.

    Speaking of monitoring, there are several options. SimpliSafe offers a free self-monitoring option, which makes it one of the best no-fee systems out there, as well as regular monitoring for $19.99 per month and Fast Protect for $29.99 per month. Keep in mind that you won’t have to sign a contract with SimpliSafe, so if you ever want to adjust your level of service, you can.

    Monitoring Options Self or professional
    Installation DIY or professional
    Smart Platform Integration Alexa and Google Home
    Equipment Cost From $249.96
    Monthly Monitoring Cost From $19.99
    Contract Length Month-to-month
  • 2 ADT Self Setup - Best Security Cameras

    ADT Self Setup Product Image
    SecureScore™ 8.6
    Customer Service
    8.6
    Value
    7.9
    Equipment
    8.2
    Features & Technology
    8.9
    Ease Of Use
    9.5
    SecureScore™
    8.6

    A Quick Look at ADT Self Setup

    You’ll rarely hear ‘ADT’ and ‘DIY’ mentioned in the same breath – or at least that used to be the case until March of 2023 when ADT launched its ADT Self Setup packages. I was obviously excited so I immediately went to test ADT Self Setup. It was everything I expected from an ADT security system, and then some.

    ADT Control Panel

    ADT Control Panel

    Let’s start with the equipment. The system came with the same security sensors as the ones I tested in my ADT review. These are high-quality sensors you’d expect from a professionally installed system, but with the convenient setup of a DIY system. There’s nothing too special about them in terms of features, though.

    And then I got to the security cameras. For a couple of years now, ADT has been offering Google Nest Cams as part of its original, pro-installed systems. And surprisingly, ADT Self Setup came with those same Google cameras. I bought the indoor model, the battery-powered outdoor model, and the battery-powered doorbell camera – all made by Google Nest. I have more to say about these cameras in my Google Nest Cam review, but all in all, they are some of the smartest cameras I’ve tested. They all have person detection, facial recognition, and extremely insightful and detailed notifications.

    Pro Tip: If you don’t like Google Nest, but like everything else about ADT Self Setup, you can still get other options for cameras. All you need to do is reach out to their customer support and they’ll help find a camera that works for you.

    Lastly, I was most surprised to find out that the ADT Self Setup system offers optional self-monitoring, but that the professional monitoring service uses the same monitoring network as the classic ADT system. What that means is that you’ll enjoy the reliability of having redundancies built upon redundancies – nine monitoring facilities in different locations, each with backup power and communication – while still having the option to cut costs by switching to a self-monitored plan.

    • Excellent reputation
    • Rock-solid equipment
    • Exceptional monitoring technology
    • Google Nest options available
    • One-touch emergency response

    • A little pricey
    • Requires monthly monitoring
    • Limited options

    Installing ADT Self Setup

    The first thing I did after receiving my ADT Self Setup package was unpack everything. What immediately jumped out at me was the size and shape of the base station. It’s a rectangular tower about six inches tall and four inches at the base. It wasn’t going to fit in with my entertainment system where I originally intended to put it, nor would it look good there. Fortunately, I had some extra space next to my router.

    Next, I downloaded the ADT+ app as instructed in the manual and entered my details. From there, it was just a matter of turning on the base station, connecting it to Wi-Fi using the app, and then turning on each individual component. I also had to download the Nest Home app and create an account for the Nest Cams, by the way. But don’t worry; you’ll be able to link your Nest account with ADT to view your cameras from the ADT+ app.

    All told, I spent about 45 minutes setting up ADT Self Setup. The component that needed the most time to install was the outdoor camera because I had to mount it on my exterior wall with screws. But overall, ADT Self Setup is a true DIY option from ADT.

    >> Learn More: Where to Place Security Cameras

    ADT Self Setup’s Cost

    As you probably know, ADT’s pricing isn’t the most wallet-friendly, but ADT Self Setup is breaking that stigma. It is more budget-friendly than ADT for two reasons. Being a DIY system is the first reason. It doesn’t require an installation fee so that’s $99 saved instantly compared to the original ADT system. The second reason is the lower equipment cost. ADT Self Setup’s packages are somehow cheaper than ADT packages by a lot. Here’s a quick comparison:

    Packages ADT Self Setup ADT Pro Install
    Build Your Own $194.98 $499
    Starter $389.96 $778
    Premium $744.92 $1,586

    Not only are ADT Self Setup packages cheaper, they also come with almost the same number of components as their ADT Pro Install counterparts. That said, ADT Self Setup doesn’t offer financing options, so the package fee is going to come right out of your pocket. With ADT Pro Install, you can choose to finance your equipment.

    Now, for monitoring, here’s a quick and easy rule of thumb to remember: If your ADT Self Setup includes security cameras, you’ll pay $34.99 per month for the Essential + Video plan. Otherwise, you can choose the $24.99 Essential plan. That’s the same as what pro-installed ADT systems charge. However, ADT Self Setup allows self-monitoring, just like SimpliSafe.

  • 3 Cove Security - Most Affordable

    Cove Security Product Image
    SecureScore™ 8.8
    Customer Service
    8.9
    Value
    8.8
    Equipment
    9.2
    Features & Technology
    8.6
    Ease Of Use
    8.4
    SecureScore™
    8.8

    A Quick Look at Cove

    Hands down, Cove is one of the best affordable security systems out there. Notice I didn’t say “cheap.” Cheap implies a lack of quality, and that’s not Cove. This company is all about giving you the most bang for your buck.

    Cove equipment

    Cove equipment

    Cove has been around since 2018, and it’s made quite a mark in the home security space. Not only is the setup lighting fast, all of its equipment is high-quality, durable, and designed with a modern touch. I also really appreciated its three-tiered response system.

    Using the control panel, I was able to talk directly to a Cove monitor using the live-assist feature, and I also received notifications via text message with its insta-text option when an alarm was triggered. My partner set off the alarm a few times during the testing period, and I always knew about it immediately. Finally, I was also able to set the system up so that I received a phone call if the system detected anything strange going on. Different people have different preferences, and it’s nice to be able to take advantage of this flexibility.

    • No contracts, month-to-month service
    • Smartphone controls
    • Touch-screen control panel
    • Alexa and Google Assistant compatible
    • Low-cost monitoring

    • App experience could be improved
    • Limited home automation features
    • No self-monitoring option

    Installing Cove

    Cove is one of the few systems that provide a physical manual to help you get set up, but there are really only four steps. Those are:

    • Plug in your panel.
    • Complete the on-screen install wizard.
    • Place your yard sign and window stickers.
    • Forward your security ownership certificate to your insurance carrier.

    The second step — after setting up the panel — will walk you through placing all of your sensors and cameras, which can all be mounted with minimal headache. The majority of their equipment can be affixed using included command strips, while bigger pieces of equipment like outdoor cameras will require screws.

    When I was reviewing Cove, I was able to get everything set up in about 20 minutes, start to finish. That said, I have the same complaint about Cove that I do about SimpliSafe: Sometimes the command strips didn’t feel secure, so I screwed some of the components into my walls and door frames. The last thing you want is to wake up at 2 a.m. with your heart racing because a sensor popped off the wall and tripped your alarm. Trust me; it’s happened to me.

    Cove’s Costs

    Similar to Frontpoint and Alder, Cove does require professional monitoring, but it doesn’t require a long-term contract like Alder and ADT do — just month-to-month. Also, that professional monitoring costs less than half what it does with the other systems on the list. Cove’s basic monitoring plan is just $17.99 per month. Keep in mind that if you want mobile app control or smart home integrations, you’ll have to go for the premium plan — Cove Plus — which costs $27.99.

    If you’re in the market for a Smart-Home compatible security system, check out the next entry on the list or read my list of the best smart security systems in the industry today.

    Regarding equipment costs, you’re going to find that Cove is extremely affordable. I have more on that in my guide to Cove’s prices, but here’s a rundown of the equipment costs:

    Component Price
    Cove Touch alarm panel $124.50
    Door sensor $7.50
    Motion detector $15.00
    Key remote $12.50
    Glass-break sensor $17.50
    Window sensor $7.50
    Smoke and carbon monoxide detector $27.50
    Flood sensor $10.00
    Medical/panic button $10.00
    Outdoor camera $99.50
    Indoor camera $49.50

    It doesn’t offer any pre-made packages, instead asking customers to build out their own systems. I actually prefer this method because it ensures you’re going to get exactly what you need and nothing that you don’t.

    In all, I paid about $300 for my Cove system. For context, the Frontpoint system was about $500, and the SimpliSafe System was about $600. If you’re looking for security on a budget, Cove should definitely be on your shortlist.

    Monitoring Options Professional or DIY
    Installation DIY
    Smart Platform Integration Alexa and Google Home
    Equipment Cost From $87
    Monthly Monitoring Cost From $17.99
    Contract Length 1 month
  • 4 Alder - Best Response Times

    Alder Product Image
    SecureScore™ 8.8
    Customer Service
    8.9
    Value
    9.1
    Equipment
    8.6
    Features & Technology
    8.7
    Ease Of Use
    8.9
    SecureScore™
    8.8

    A Quick Look at Alder

    One of life’s biggest headaches is dealing with complicated instructions. Whether you’re building flat-packed furniture or trying to fix a leaking faucet, we all know some DIY projects are harder than others.

    Alder Security Equipment

    Alder Security Equipment

    When I put Alder to the test, I found that the system was essentially hassle-free. It works right out of the box and doesn’t require you to put any holes in your walls or potentially electrocute yourself trying to install a security camera. Don’t ask me how I know. Add to that a long list of features and exceptional design, and you’ve got a great option for a DIY home security system — especially if you’re looking for a solid security system with cameras. Alder’s cams are some of the best I’ve tested.

    Like all of the options on this list, Alder takes a user-friendly approach and offers easy installation almost anyone can do, but the reason it made the list is due to its extremely fast response times. I purposefully set off false alarms to see how fast Alder responded. It typically responded in under 25 seconds. Keep in mind that the industry average is 30 seconds, so that’s pretty fast. In an emergency situation, where every second counts, it can make all the difference.

    >> Check Out: Best Home Security Company Response Times

    • Affordable Systems
    • 7-Inch Touch-Screen Control Panel
    • Easy DIY Setup
    • 4G LTE Cellular Monitoring
    • Smartphone Controls
    • Silent Exit Feature
    • Key Fob Controls
    • Alexa and Z-Wave Compatibility
    • Environmental Sensors

    • Slightly Expensive Monitoring
    • Somewhat Limited Security Camera Integrations
    • Somewhat Limited Home Automation
    • Must Call to Purchase System
    • Mobile App Is a Bit Buggy

    Installing Alder

    Alder offers a super-simple setup. I found its equipment to be really well designed, with a low profile and sleek, rounded edges. Everything can be mounted using command strips or some minor hardware installation — no need to get out the stud finder or hardwire anything. In all, it took me about 35 minutes to get everything up and running.

    One of the really cool things about Alder is that it doesn’t require a base station. Unlike SimpliSafe or Frontpoint, Alder’s keypad is the connection point for all of its equipment, meaning it pulls double duty. I really liked this approach and didn’t have to figure out a place to stash another piece of equipment. This is really handy because my partner is really particular about what can and can’t go on the mantel.

    Alder’s Costs

    Here’s where Alder loses some points with me. There is nothing transparent about its pricing on its website, and you have to call a customer service representative to build out your system. I have more on this in my guide to Alder’s prices. I’m a millennial. You know how much I hate picking up the phone.

    That said, even though it’s a DIY system, you don’t have to pay any upfront equipment fees — it’s all built into your monthly contract. That’s right. You’ll have to sign a 36-month contract with Alder, but some people don’t mind the commitment when you can avoid a big equipment bill upfront, like what you might see with SimpliSafe. Keep in mind that your monitoring costs are going to be between $30 and $55 per month, so that’s something to consider when you’re factoring this system into your budget.

    If you’d rather not sign on the dotted line, you might head over to my list of the best no-contract security systems. You obviously won’t see Alder over there, but there are plenty of good options for commitment-averse folks.

    Monitoring Options 24/7 professional only
    Installation Professional or DIY
    Smart Platform Integration Alexa and Google Home
    Equipment Cost $0
    Monthly Monitoring Cost $35
    Contract Length 36 months
  • 5 Frontpoint - Easiest Setup

    Frontpoint Product Image
    SecureScore™ 8.7
    Customer Service
    9.1
    Value
    8.8
    Equipment
    8.3
    Features & Technology
    8.9
    Ease Of Use
    8.6
    SecureScore™
    8.7

    A Quick Look at Frontpoint

    One of the best wireless security systems in the industry today, Frontpoint has always been a disrupter in this space. It was a pioneer of the DIY security movement along with Ring and SimpliSafe, and while it might not have the same name recognition as its competitors, you shouldn’t discount it.

    Frontpoint equipment

    Frontpoint equipment

    The primary reason Frontpoint is on this list is, as you would expect, that it’s really easy to set up this system. While that’s true for every entry here, with Frontpoint, it’s something more. From the time I unboxed my Frontpoint system, everything just made sense; everything just worked. At no point during my setup process was I confused, wondering where a piece of equipment should go or how it should be installed. Frontpoint has clearly taken a lot of time designing its systems with users in mind.

    FYI: Frontpoint isn’t a perfect security system. I found its mobile app to be a bit clunky and outdated. And its entryway sensors could also use a redesign.

    • High-quality GE equipment
    • Easy DIY installation
    • LTE cellular monitoring
    • Home automation
    • Geofencing feature

    • Somewhat expensive monitoring
    • Limited service hours
    • Touch-screen panel sold separately
    • Outsourced monitoring service
    • Limited keypad functionality

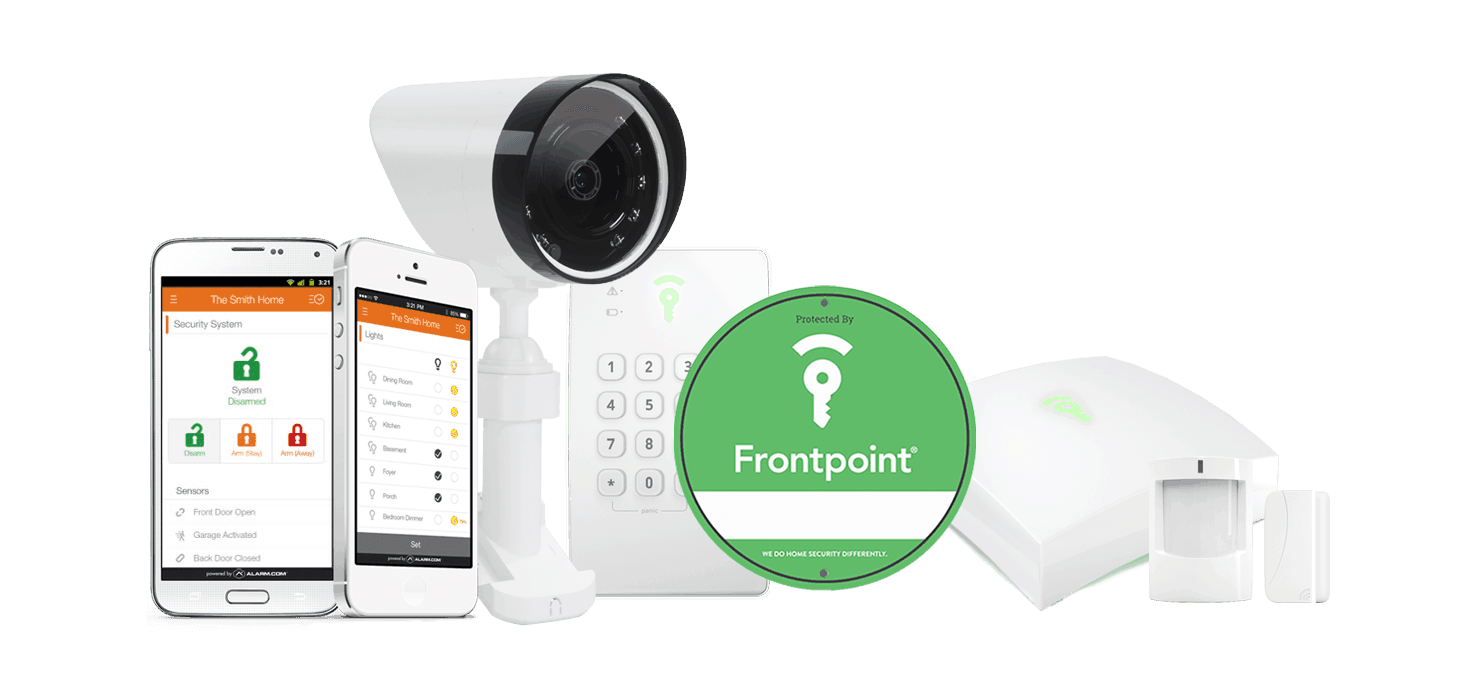
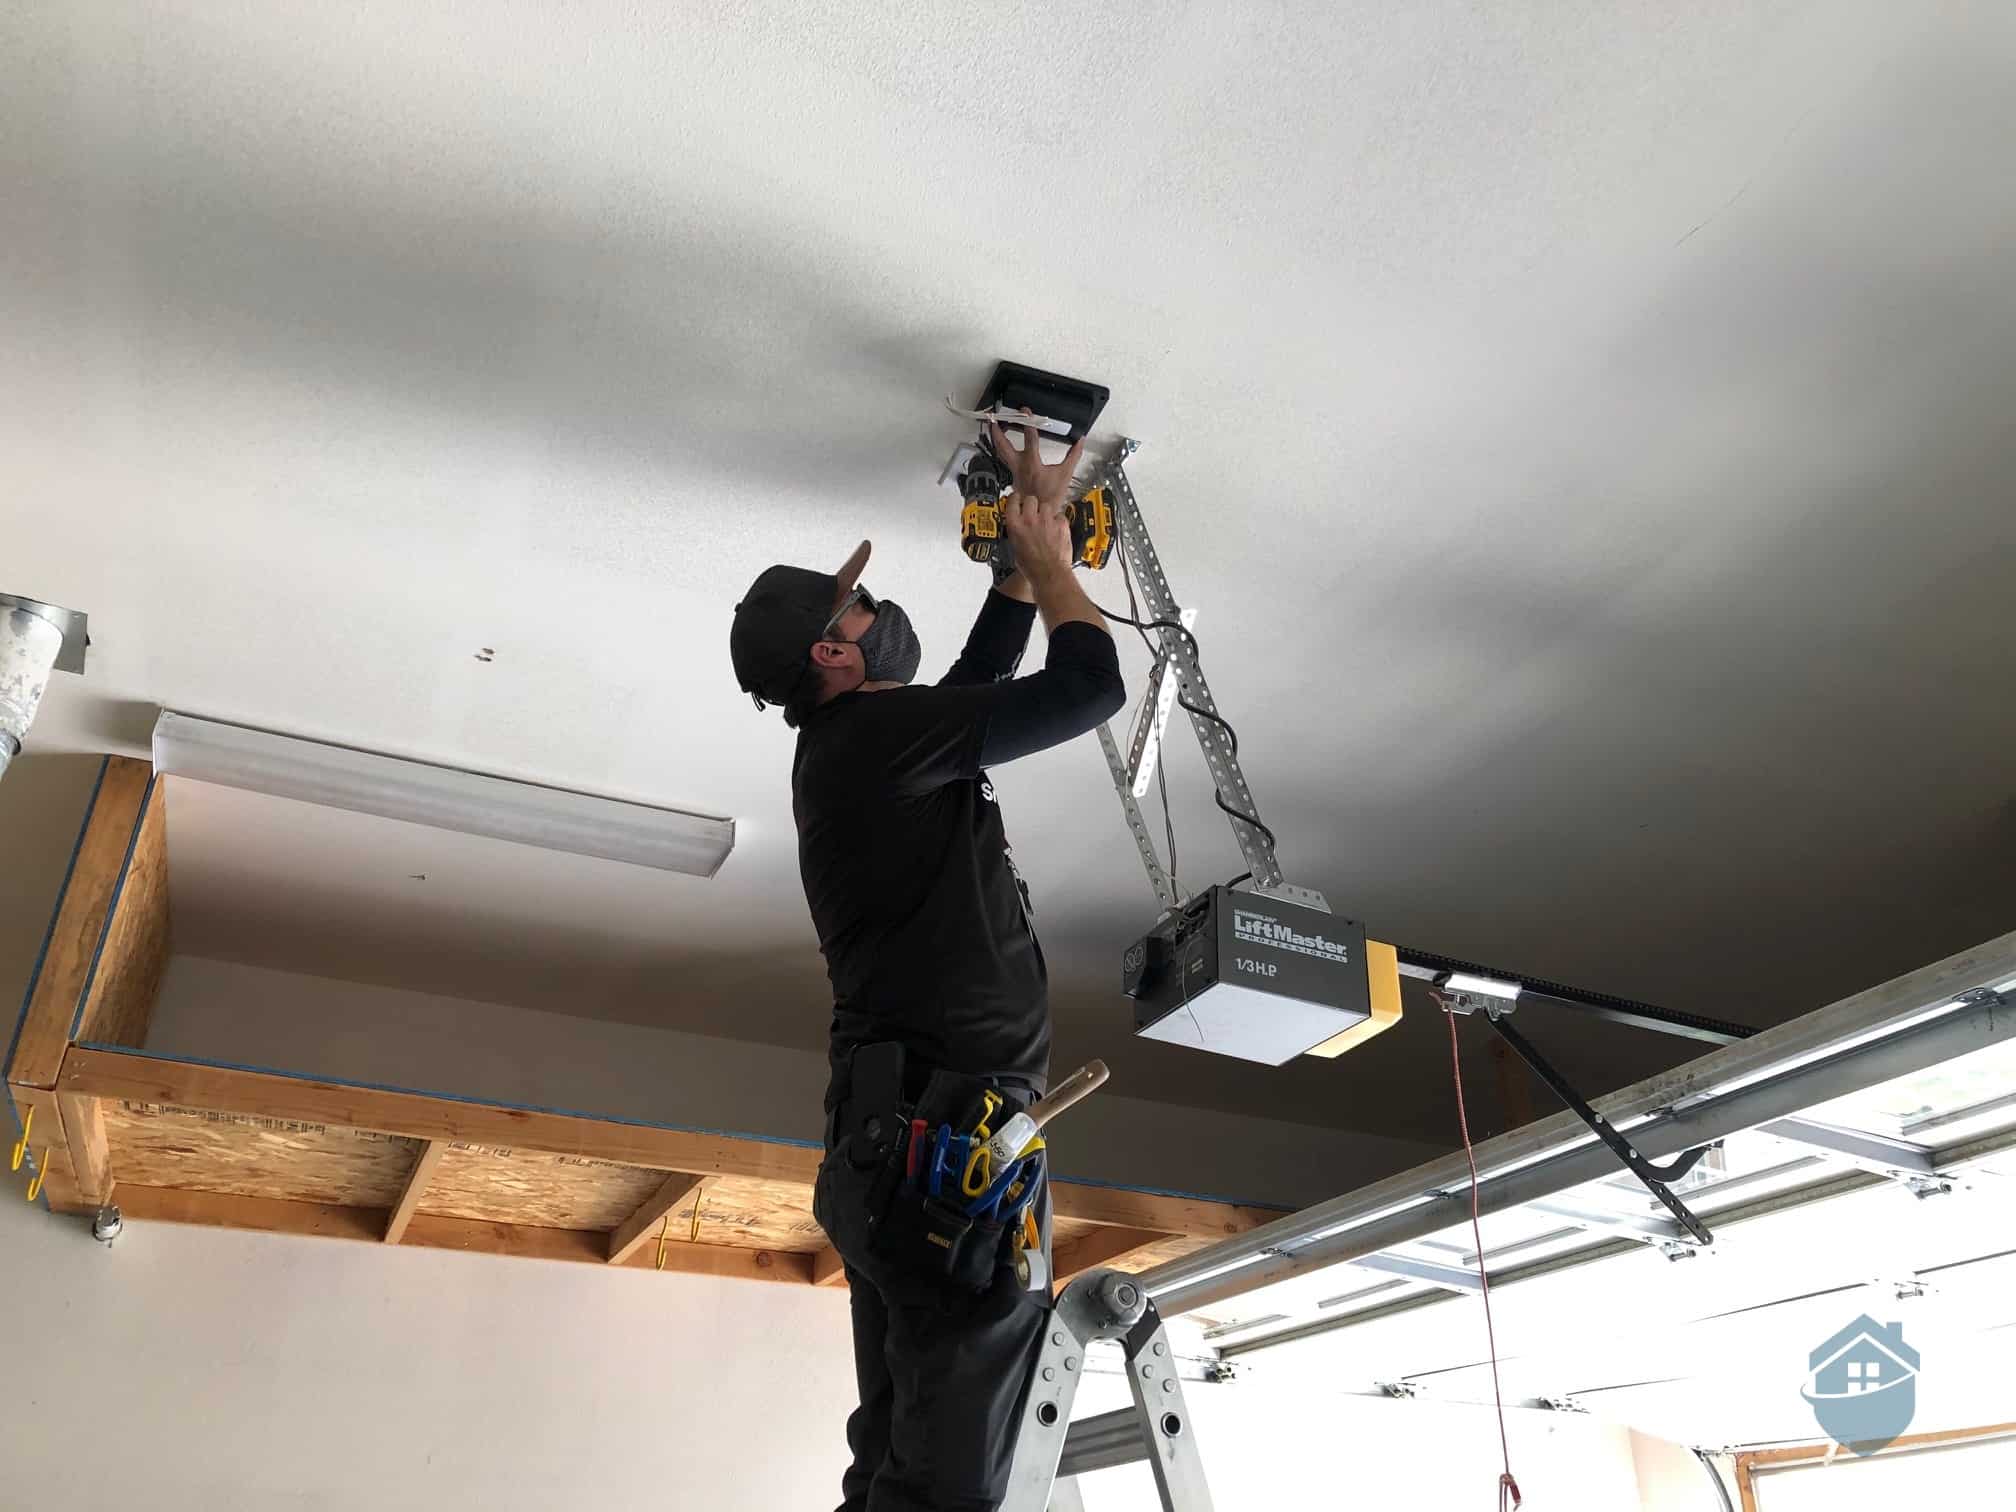
    Installing Frontpoint

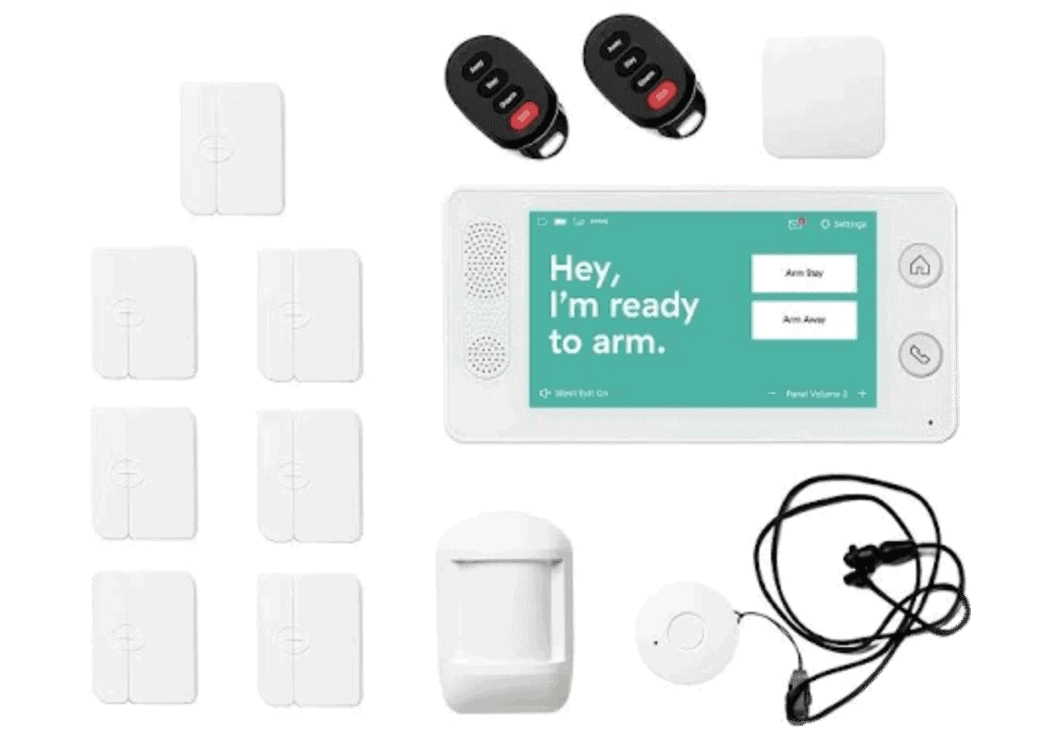
    When comparing Frontpoint and SimpliSafe, you’ll see that Frontpoint offers a few more options for equipment compared to SimpliSafe. The major components are all there — the security cameras, the entryway sensors, the motion sensors — but Frontpoint also offers a few bells and whistles, like garage door tilt sensors and glass-break sensors. We’ll get more into that in the section below, but for now, let’s talk about what it was like to set up this system.

    In a word, easy. In two words, very easy. You can read more about this in my Frontpoint review, but everything is packaged thoughtfully, and the setup process is intuitive — whether this is your 100th DIY project or your first. Once you plug in the hub and download the app, you’ll be walked through step-by-step, detailed instructions on how to install everything.

    There are two things I’d like to mention. First, Frontpoint’s hub is one of the most aesthetically pleasing pieces of security equipment I’ve used. It has a sleek, opalescent look that you won’t feel you immediately need to hide behind a houseplant. Functionally, it works using dual connections: Wi-Fi and cellular LTE, with the latter being the primary. This redundancy is to add increased dependability, which I really appreciate.

    Second, Frontpoint has some of the best customer service for a security system. I ran into a bit of a hiccup when one of my entryway sensors wasn’t connecting to my hub, but after a quick call, everything was up and running — no wait times, no hassle of replacing equipment. In all, it took me a little over half an hour from boxes to a fully protected home.

    Frontpoint’s Costs

    Similar to SimpliSafe, Frontpoint offers a few security packages. Here’s what that looks like:

    Name Equipment Regular price Sale price
    Ultimate Home Security System
    • Hub
    • Keypad
    • Touch screen
    • Door sensors (5)
    • Glass-break sensor
    • Smart door lock
    • Flood sensor
    • Indoor camera
    • Doorbell camera
    • Yard sign and stickers
    $1,351.83 $419
    Premier Home Security System
    • Hub
    • Keypad
    • Touch screen
    • Door sensors (3)
    • Doorbell camera
    • Yard sign and stickers
    $771.90 $169
    Starter Home Security System
    • Hub
    • Keypad
    • Door sensor (1)
    • Yard sign and stickers
    $541.91 $79.99

    I do want to point out that you can pretty much ignore that regular price column. Frontpoint is always running a sale, so I’ve included the current discounted prices as well. While they might not be exactly the same when you’re shopping, they’ll be a lot closer to the sale price than the retail price.

    For a little more context, below are the discounted prices Frontpoint offers for you to customize your system or build your own.

    Component Price
    Carbon monoxide sensor $65.49
    Door or window sensor $19.24
    Doorbell camera $109.99
    Extra keypad $30.24
    Flood sensor $24.74
    Garage door tilt sensor $24.74
    Glass-break sensor $41.24
    Indoor camera $65.99
    Keychain remote $17.59
    Motion sensor $38.74
    Outdoor camera $126.49
    Outdoor smart plug $27.49
    Premium indoor camera $109.99
    Smart door lock $109.99
    Touch screen $82.49

    When it comes to monitoring, Frontpoint is a bit of an outlier. All of its systems are professionally monitored, with no option for self-monitoring. This is a pretty big drawback in my eyes. And, at $49.99 per month, it’s not exactly cheap. I would argue that it could be worth the investment for some folks since Frontpoint has some of the best professional monitoring in the industry.

    Monitoring Options Professional only
    Installation DIY
    Smart Platform Integration Alexa and Google Home
    Equipment Cost From $219.99
    Monthly Monitoring Cost $50
    Contract Length 1-36 months
  • 6 abode - Best Smart Home Integrations

    abode Product Image
    SecureScore™ 8.0
    Customer Service
    7.3
    Value
    8.3
    Equipment
    8.2
    Features & Technology
    8.3
    Ease Of Use
    8.0
    SecureScore™
    8.0

    A Quick Look at abode

    One of the most technologically advanced systems I’ve ever tested, abode is a great option for folks looking for the ease of a DIY system with some of the futuristic flair of smart home automation.

    While still keeping things affordable with a DIY setup, abode lets users integrate and control all sorts of third-party smart equipment into the network to add some security and a whole lot of convenience. When I was testing out this system, I used my Alexa to go into “at-home mode” every morning; I can turn on my lights and turn down the air conditioner just using my voice. For more information on that, check out my guide to the best Alexa home security systems.

    abode Equipment

    abode Equipment

    • No long-term contracts
    • Hub with built-In HD camera
    • CUE home automation platform
    • No monthly-fee option
    • Integrates with Apple HomeKit, Amazon Alexa, Google Assistant, and Z-Wave compatible devices

    • Setup could be more intuitive
    • Limited equipment in starter kits
    • No touch screen panels
    • Customer service could be improved

    Installing abode

    Despite all of the high-tech bells and whistles, the core abode system is extremely easy to set up and install. Plug in your Gateway, connect it to your home internet network using the included Ethernet cable — don’t worry, this step is just for the setup; you can connect it to your Wi-Fi later — and download the app. The app will tell you step by step how to set up and install the other pieces of equipment you purchased, like your motion sensors and security cameras.

    The one drawback I found during this setup process was that the Gateway tends to make a lot of noise throughout the day, depending on how active your system is. Mine was always beeping and booping — so much so that I took to calling it R2-D2. It actually got a little annoying living with it day-to-day, but the good news is I was able to quiet him down by going into the system settings on my phone and selecting “Mute all sounds.” Easy enough!

    abode’s Costs

    Like I said above, abode keeps things affordable. While it’s not as cheap as Cove, it’s still squarely in the “reasonable” category. Here’s a quick rundown on what you’ll pay for one of its security bundles:

    Security package Number of pieces Regular price Current sale price
    Smart Security Hub (build your own) 1 $249.99 $189.99
    abode Security Kit 3 $139.99 $109.99
    Smart Security Kit 4 $209.99 $209.99
    iota All-in-One Security Kit 3 $379.99 $259.99
    Smart Security Hub 9 $680.00 $339.99
    iota Hub 8 $800 $379.99

    Similar to Frontpoint, abode tends to keep its “regular” prices really high and always offer a sale. I’m not a huge fan of this sales tactic, but I did include the sale price at the time I wrote this list to give you an idea of what you should expect to pay.

    Keep in mind that you can bolster these systems with individual pieces of equipment or create your own system. Here’s a list of abode’s component prices:

    Component Cost
    abode Cam 2 $34.99
    Door or window sensor $20.00
    Acoustic glass-break sensor $51.99
    Vibration glass-break sensor $37.99
    Key fob $25.99
    Keypad 2.0 $94.99
    Mini door or window sensor $27.99
    Motion sensor $43.99
    Multipurpose sensor $45.99
    Panic button $28.99
    Recessed door or window sensor $32.99
    Siren (indoor) $55.99
    Siren (outdoor) $89.99
    Slim strip sensor $32.99
    Smart home power switch $44.99
    Smoke alarm monitor $39.99
    Water-leak sensor $54.99

    My test system cost me around $450 when all was said and done, but you might want to pick up some professional monitoring; that will run you $20 per month. I wrote up an article on professionally monitored versus self-monitored security systems so you can figure out which is best for you, but abode offers the flexibility of both. Also, since its contracts are month-to-month, you can always change things up.

    Monitoring Options Professional and DIY
    Installation DIY
    Smart Platform Integration Alexa, Google Home, and Apple HomeKit
    Equipment Cost From $139.99
    Monthly Monitoring Cost From $5.83
    Contract Length Month-to-month

The Benefits of DIY Home Security

More and more, homeowners are thinking of home security as a must-have item. Living in the U.S., where property crime is a worrisome trend, it's comforting to know you — or a professional — can watch over things 24/7. However, DIY installation of home security systems offers its own benefits. For many people, the investment in a home security system is only possible when they do not have to pay extensively for installation, as the best DIY home security options have shown. But why is it so beneficial? Here are a few key reasons most homeowners benefit immediately from these solutions:

Cost

Simply put, installing a system yourself keeps the costs low. Providers that require professional installation will often charge you $100 or more for that service, and oftentimes, these systems are permanently wired and installed. If you don't mind picking up a drill, you can save that money and also have the flexibility of being able to move your system with your family.

Contracts

Many of the DIY home security systems are straightforward investments. Unlike the top professionally installed systems in the market, DIY security systems typically don't require long-term contracts. This can help to significantly reduce the overall cost. If the company does have a contract, it will typically be a month-to-month plan. This makes it easier for the homeowner to terminate the contract without expensive fees. It also allows you to switch systems or make changes as you would like to, keeping you in control of your home's security.

Flexibility

If you value flexibility, you really need to consider do-it-yourself options. After all, you may decide to change the location of a camera or upgrade to newer equipment down the road. Heck, that big book deal might hit, and you'll finally buy that condo down in Puerto Rico and retire. If that's the case, a DIY security system tends to be more convenient since equipment doesn't need complex hardwiring. If you don't want to jump into the deep end of home security quite yet, a DIY system with no contract is probably the best-case scenario for you.

How to Choose a DIY Home Security System

Having a home security system is the single most important thing you can do to protect your family and your property. But, as you know, choosing the right system can be time-consuming due to the number of options and the vast amount of data out there. That's why it's much easier to use a review website such as this one, where all the information has been compiled and broken down into easy-to-read bits of information.

Here are a few suggestions for choosing the right home security system for your particular situation.

How Easy Is It to Install?

The main reason people buy a DIY home security system is that they are generally easy to install. However, that's not the case with all of them. Therefore, be sure to review the installation instructions before deciding on which one you feel you can install yourself.

Does it come with customer and/or technical support?

Even though most DIY home security systems are easy to install, there is still a chance you might need to clarify something if an issue comes up that is unique to your installation. Therefore, it's important the brand you choose has a customer service and/or technical support department you can contact if you have a question.

Is the brand you've chosen reputable?

Before you make a purchase, be sure to review any company's equipment quality and reputation. You need to know if the equipment is going to hold up and if your chosen brand will stand behind its products if they should fail.

Yes, I realize you have probably already thought about this; however, if you don't spend some time comparing your options, you could end up not getting the most for your money. That's why it's so important that you take advantage of the side-by-side comparisons that can be found on reputable review websites. Being able to see all the most popular brands, their options, and pricing side-by-side is the best way to make sure you are getting the most for your money.

Frequently Asked Questions About DIY Home Security Systems

Features of DIY Home Security Systems

The best wireless DIY security systems offer the same benefits as hardwired systems. Here are the essential features and extras to consider.

Control Panel

Several DIY wireless home security systems include a quality control panel. This feature lets you arm and disarm the system, and it often has a panic button if you need to connect with an emergency operator. Certain control panels offer live-voice assist, and others have modern touch screens that put your home security and home automation controls in one sleek device.

Entry Sensors

The best DIY home security systems truly excel when it comes to entry sensors. These magnetic sensors are placed on door frames and windows. When the system is active and the magnets separate, the alarm sounds, and you will likely receive an alert. DIY systems come with easy-to-install (velcro or command-strip mounted!) entry sensors. You'll have them up in no time flat.

Motion Detectors

Chances are your DIY security system will bundle in motion detectors. These infrared devices are simple to set up and work around the clock to monitor the inside of your home. The moment one of them senses movement, the alarm sounds and alerts are sent. And don't worry about your dog tripping the sensor. Most devices are smart enough to distinguish between pets and people.

Glass Break Sensors

Burglars break windows. It's in their nature. So, it's important to outfit your home with glass-break sensors. The sensors have built-in microphones that listen to the sound frequency of breaking glass. When a sensor detects glass breaking, it sounds the alarm and sends an alert. This DIY feature is often sold as an upgrade, but it's worth it. Don't pass on glass-break sensors.

Panic Buttons & Pendants

Panic buttons are another top feature of DIY home security systems. Users can strategically mount these around their home. Put them in the bathroom, the kitchen, or the garage — and don't miss a beat when a break-in occurs. Panic buttons are especially helpful for seniors who live alone and often come built in to control panels, keychain fobs, and necklace pendants.

Remote Control

DIY home protection from a keychain? It almost sounds too good to be true. But a remote control puts your security commands on a tiny remote, perfect for a keychain. Arm and disarm the system, hit the panic button, and simply enjoy the controls that fit in your pocket or purse. It's the 21st century, after all, and we'd expect nothing less.

Mobile Access

DIY wireless home security systems almost always offer mobile access — an impressive feature powered by a companion app. Simply log in to the app to access your controls. You can arm and disarm the system, monitor activity, view live camera feeds, and even control home automation features. What's not to love about mobile access?

Home Automation

The best DIY home security systems are compatible with home automation features. We're talking about everyday household features — like heating and cooling, lights, and door locks — now made possible to control with your smartphone (and, in some cases, your voice!). Often, these features fit seamlessly into your wireless home protection ecosystem. Your life just got a whole lot easier.

Cellular Monitoring

It's no secret that hardwired home security systems have their limitations. Lines can be cut, and power can go out. But today's best DIY alarm systems are powered by cellular monitoring. They get their juice from a cellular signal (similar to your phone), which just about guarantees around-the-clock, uninterrupted protection. Get 24/7 home security the modern way — only with cellular monitoring.

Rob Gabriele
Written By
Rob Gabriele
Managing Editor & Home Security Expert

As a home security expert and Managing Editor for SafeHome.org, Rob Gabriele has written and edited over 1,000 articles related to home security. His expertise is in smart home protection with thousands of hours of testing and research under his belt. Formerly a reporter and producer for the USAToday network, Rob has been a writer and editor for over 10 years. He holds a Master’s of Science with an emphasis on writing from the University of Montana, and he currently lives in Indianapolis, IN.